
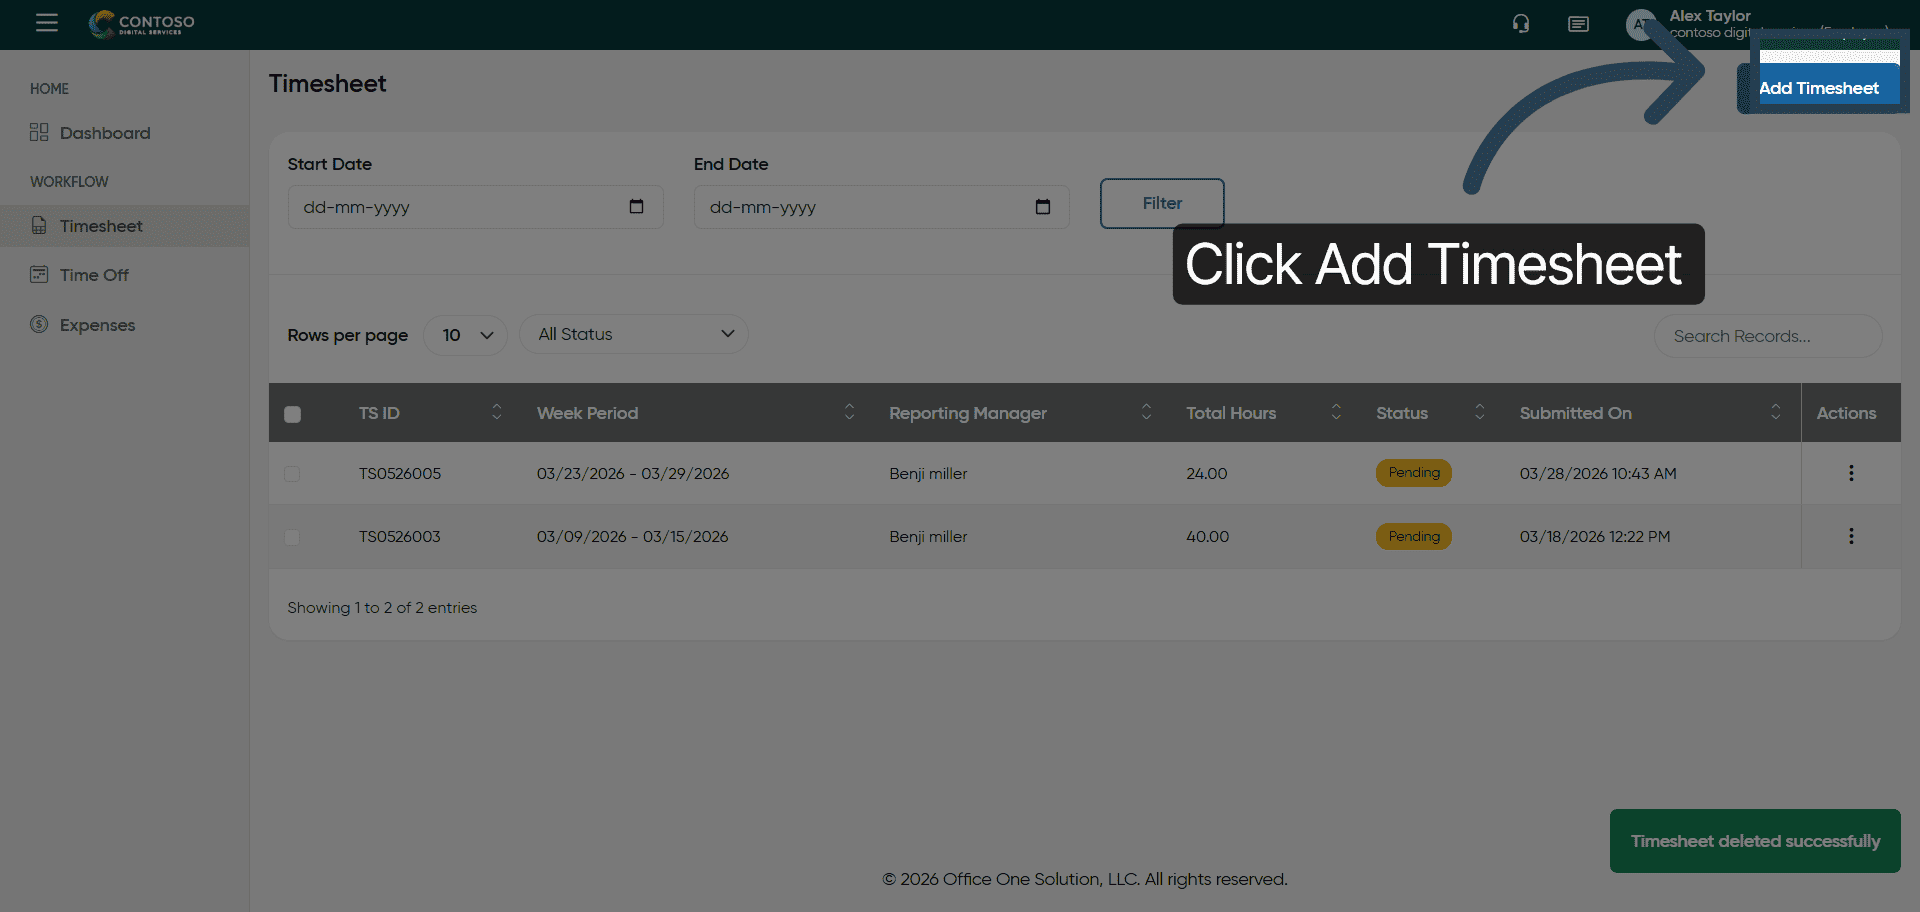
Add Timesheet
This tutorial guides you through managing timesheets in OfficeOne
Go to app.office1solution.com
1. Introduction
You will learn how to add, edit, and submit timesheet entries effectively.
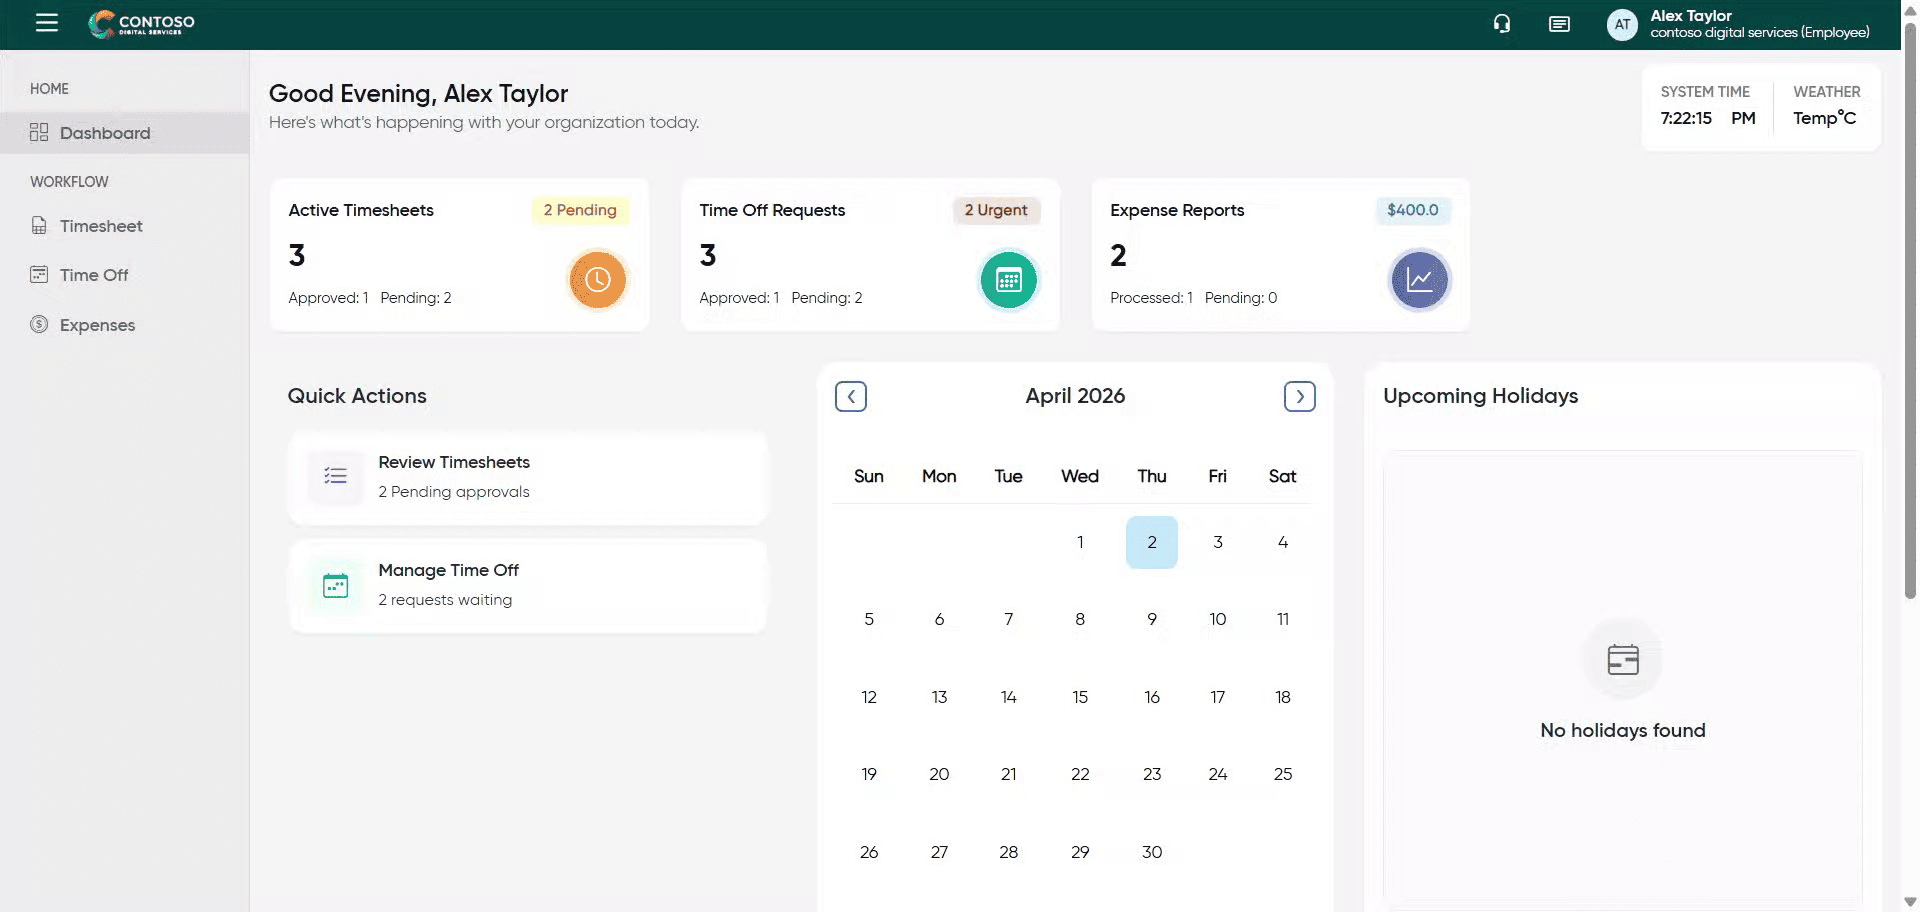
2. Access Timesheet Section
Click the Timesheet section to begin managing your work hours.
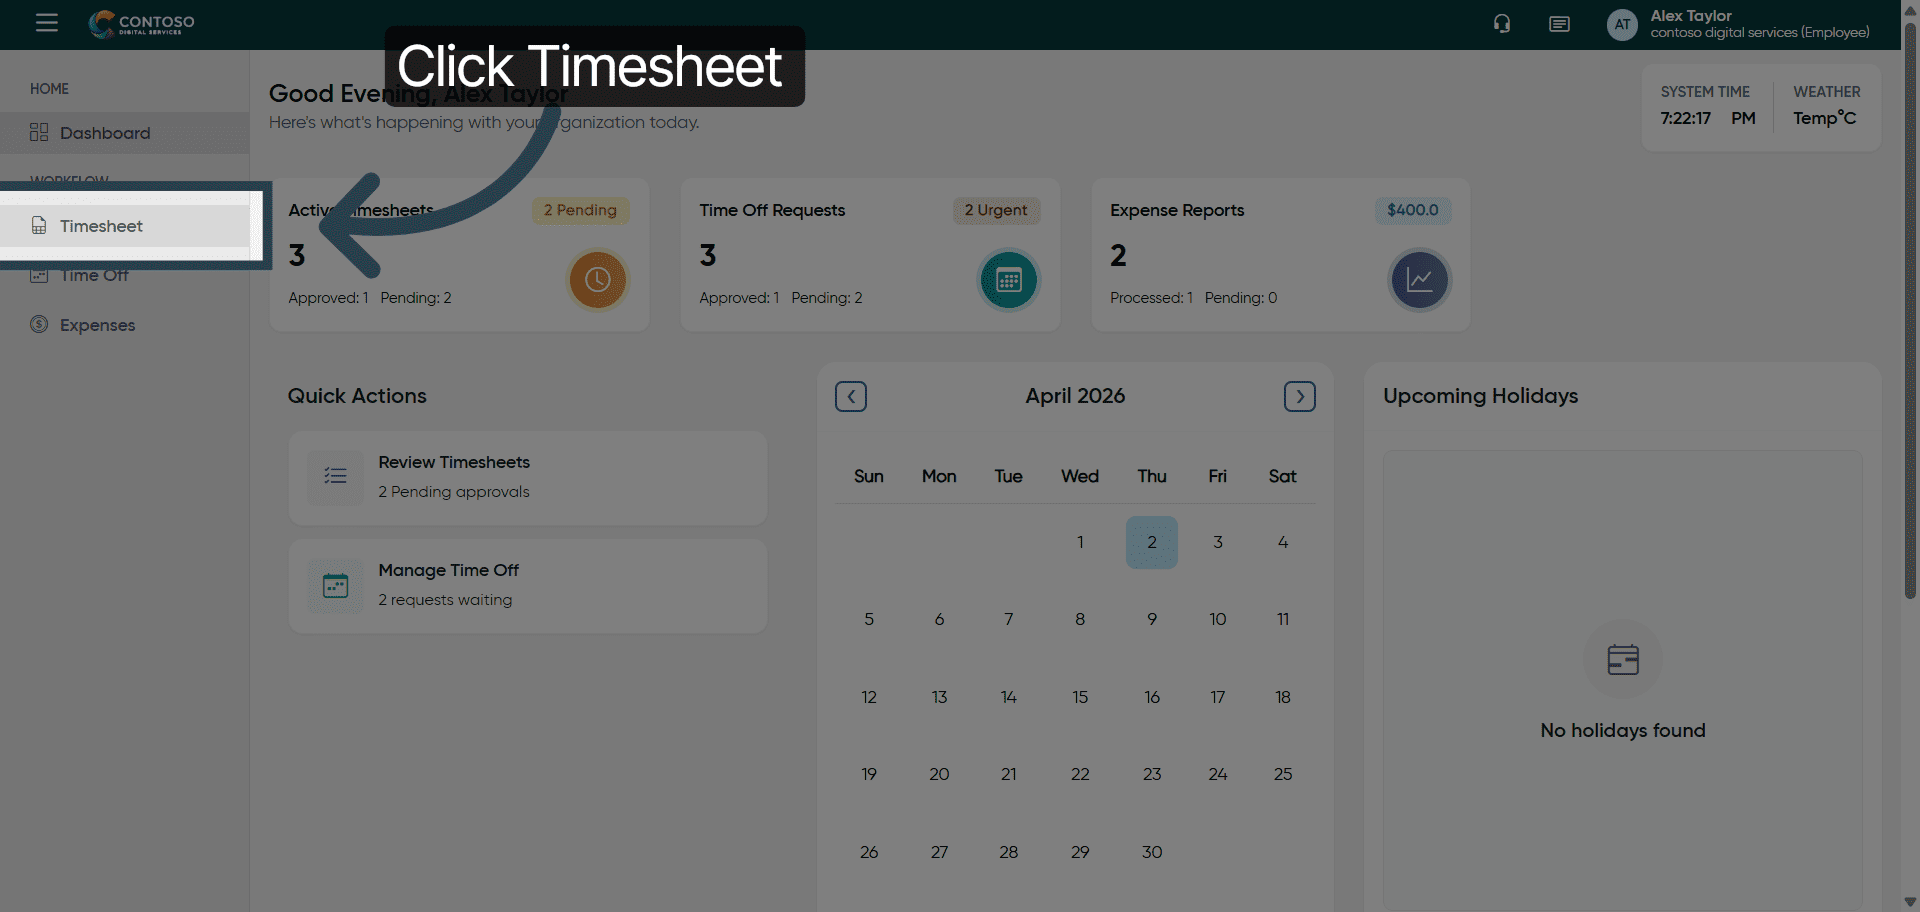
3. Open Add Timesheet Form
Click Add Timesheet to create a new timesheet entry.
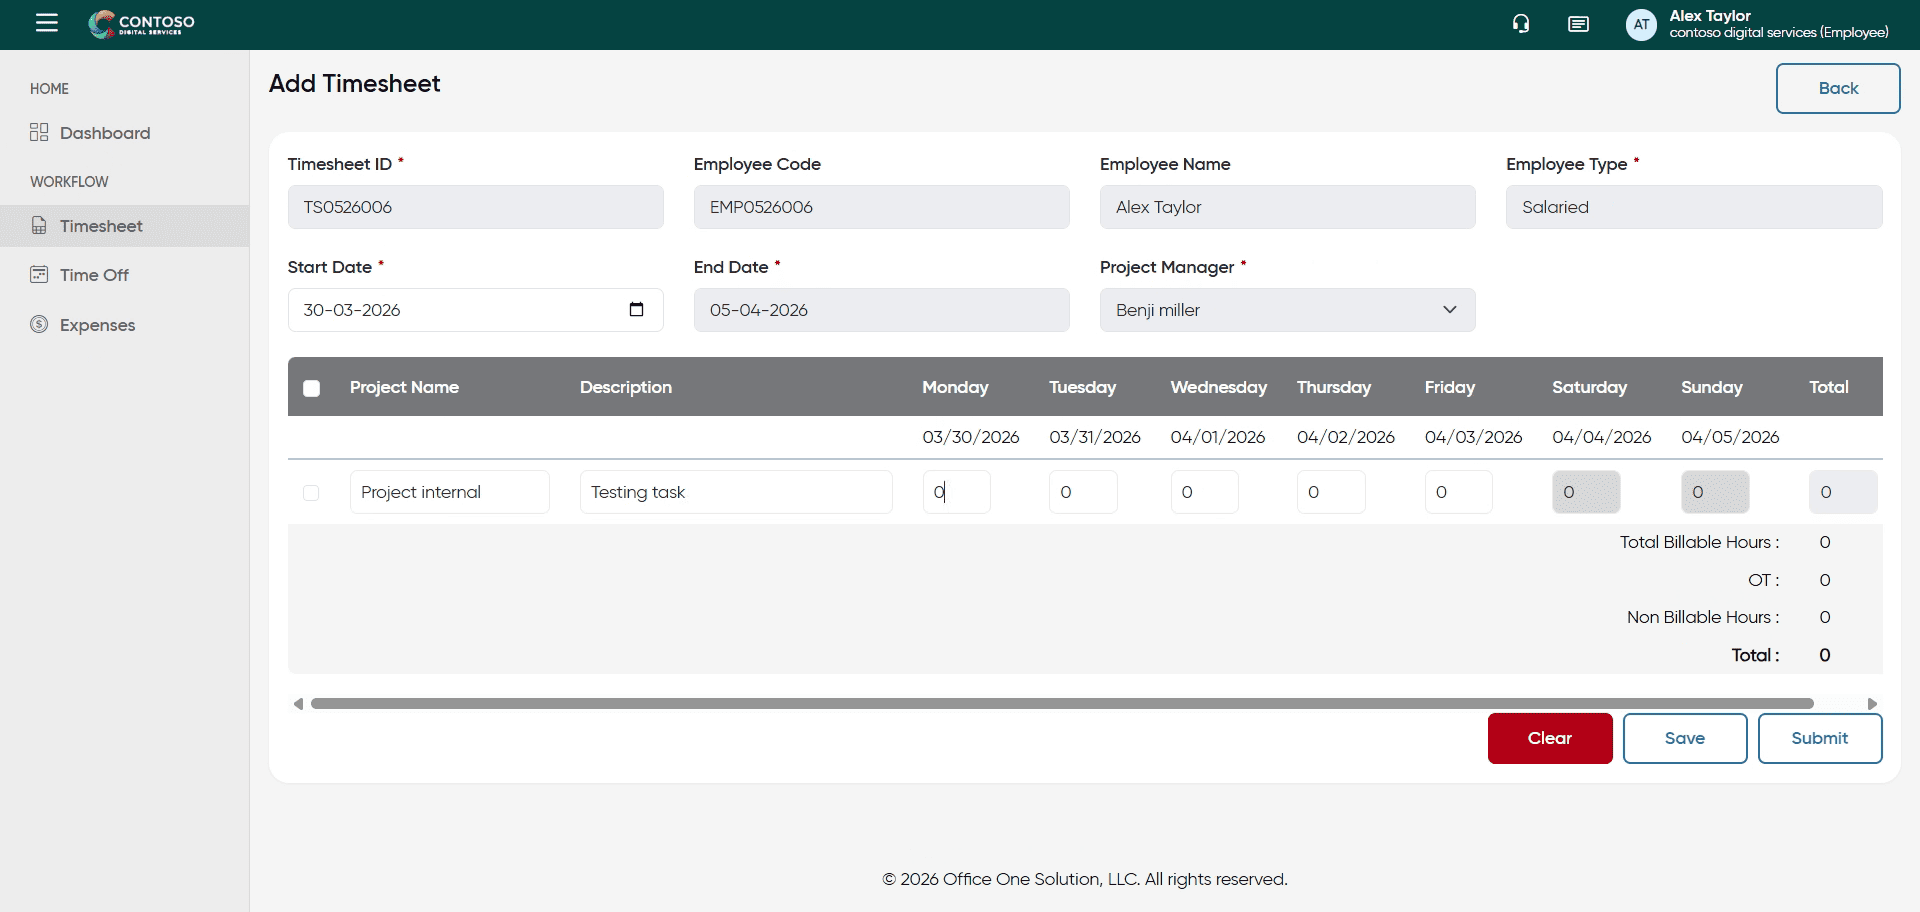
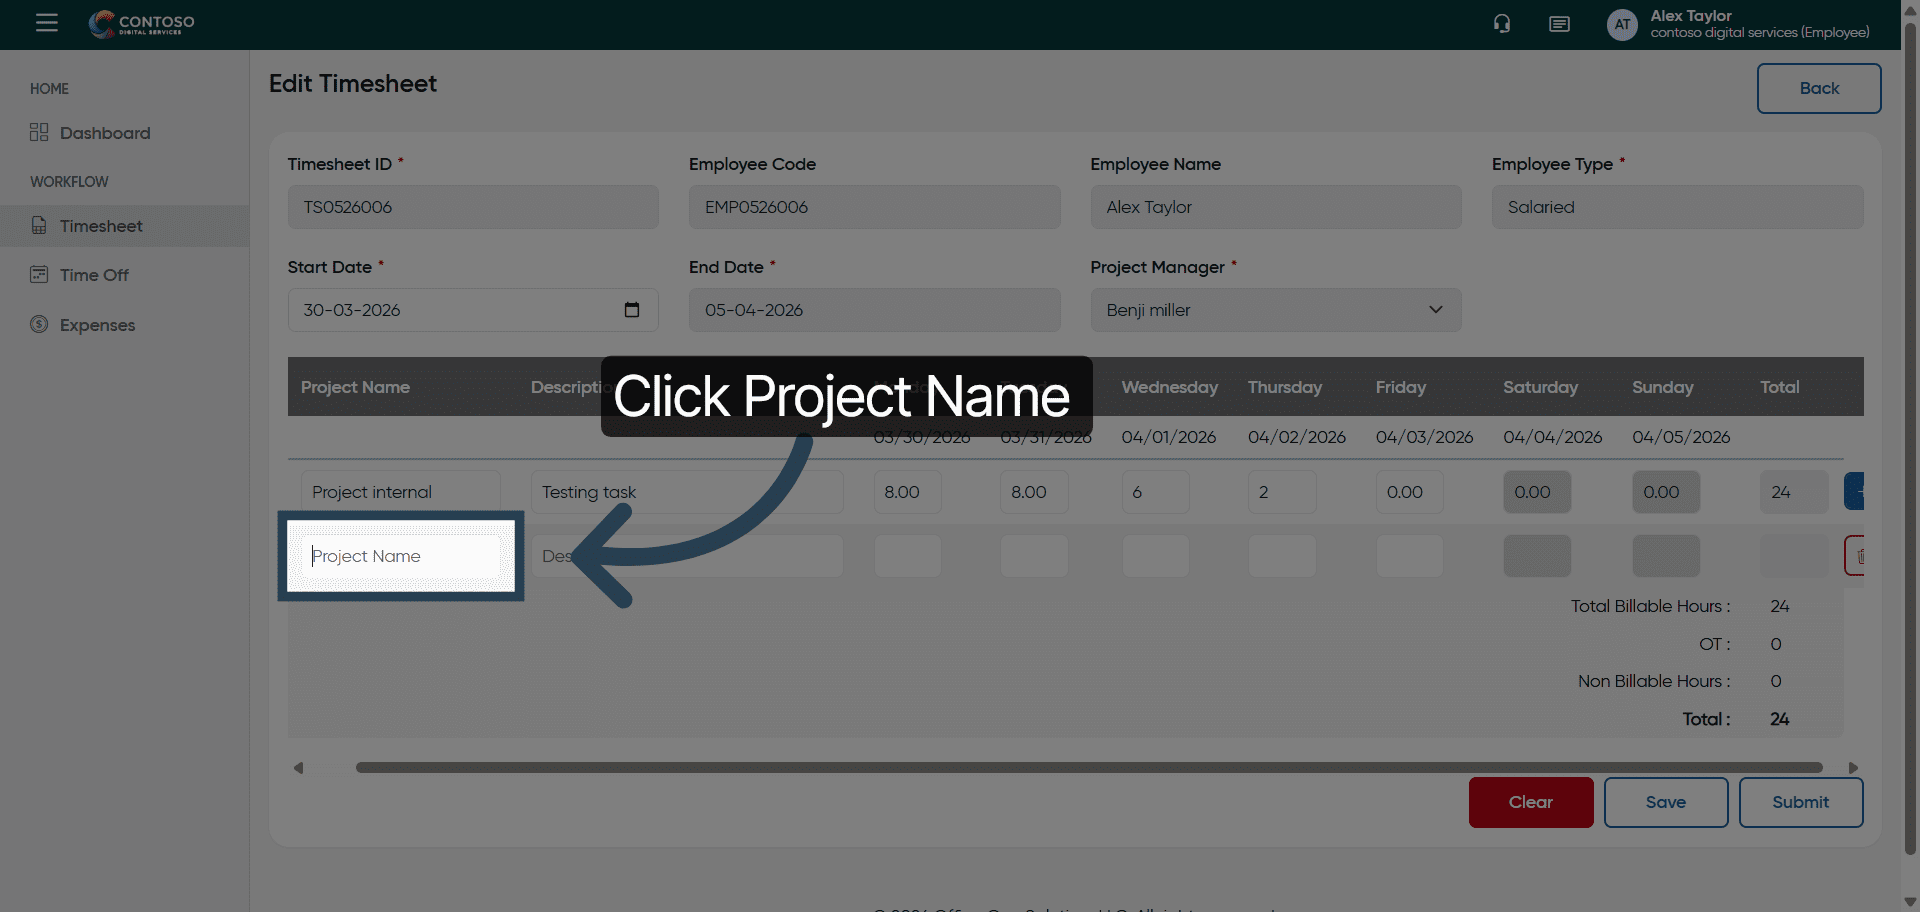
4. Select Project Name Field
Click the Project Name field and enter the details to specify the project for your timesheet.

5. Enter Internal Project Name

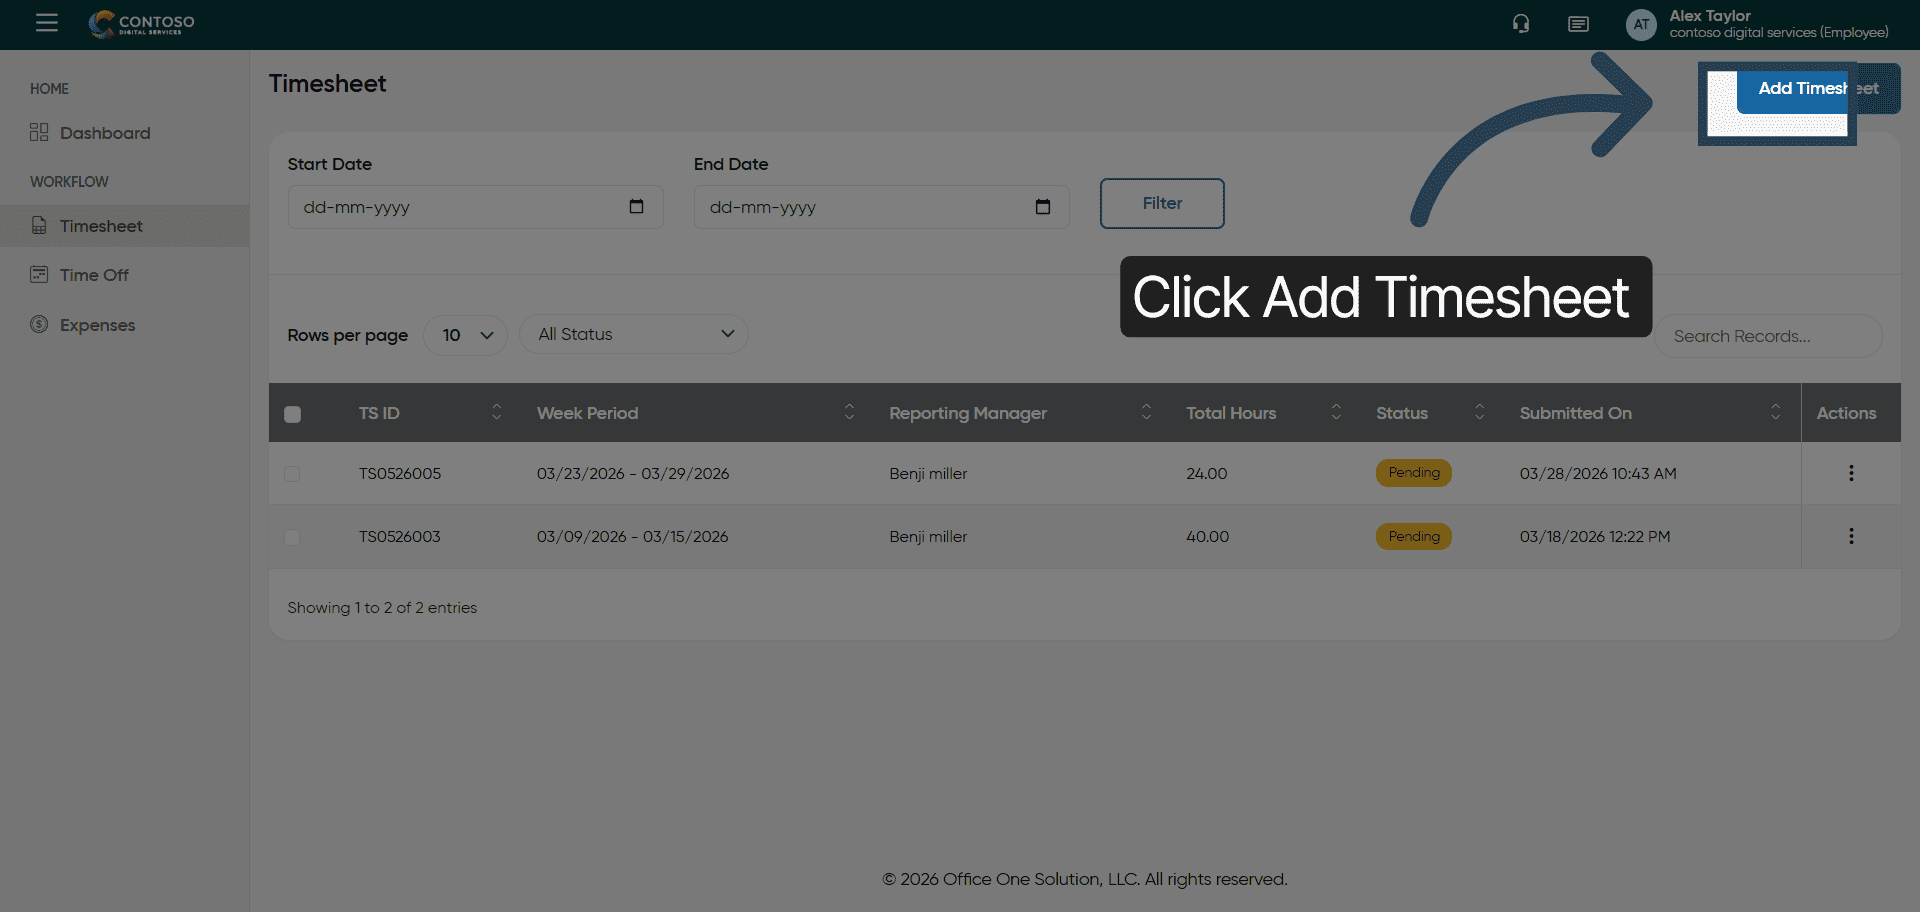
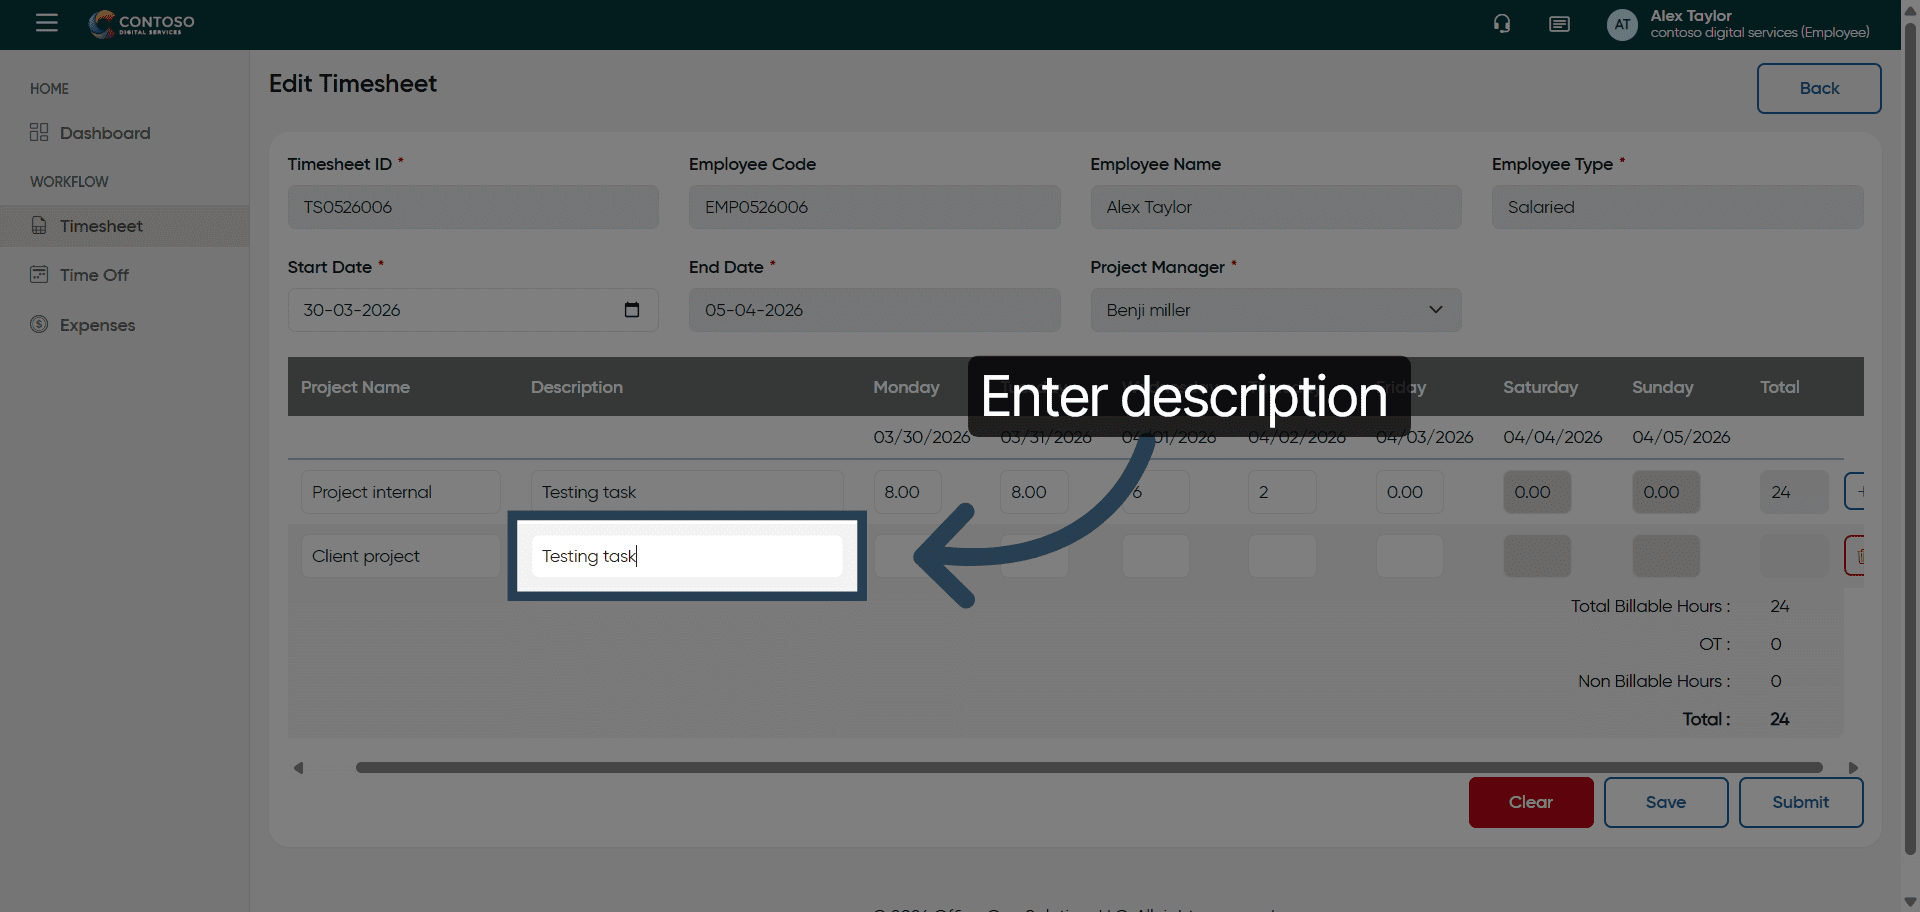
6. Select Description Field
Click the Description field and fill the details about your task.
7. Enter Task Description

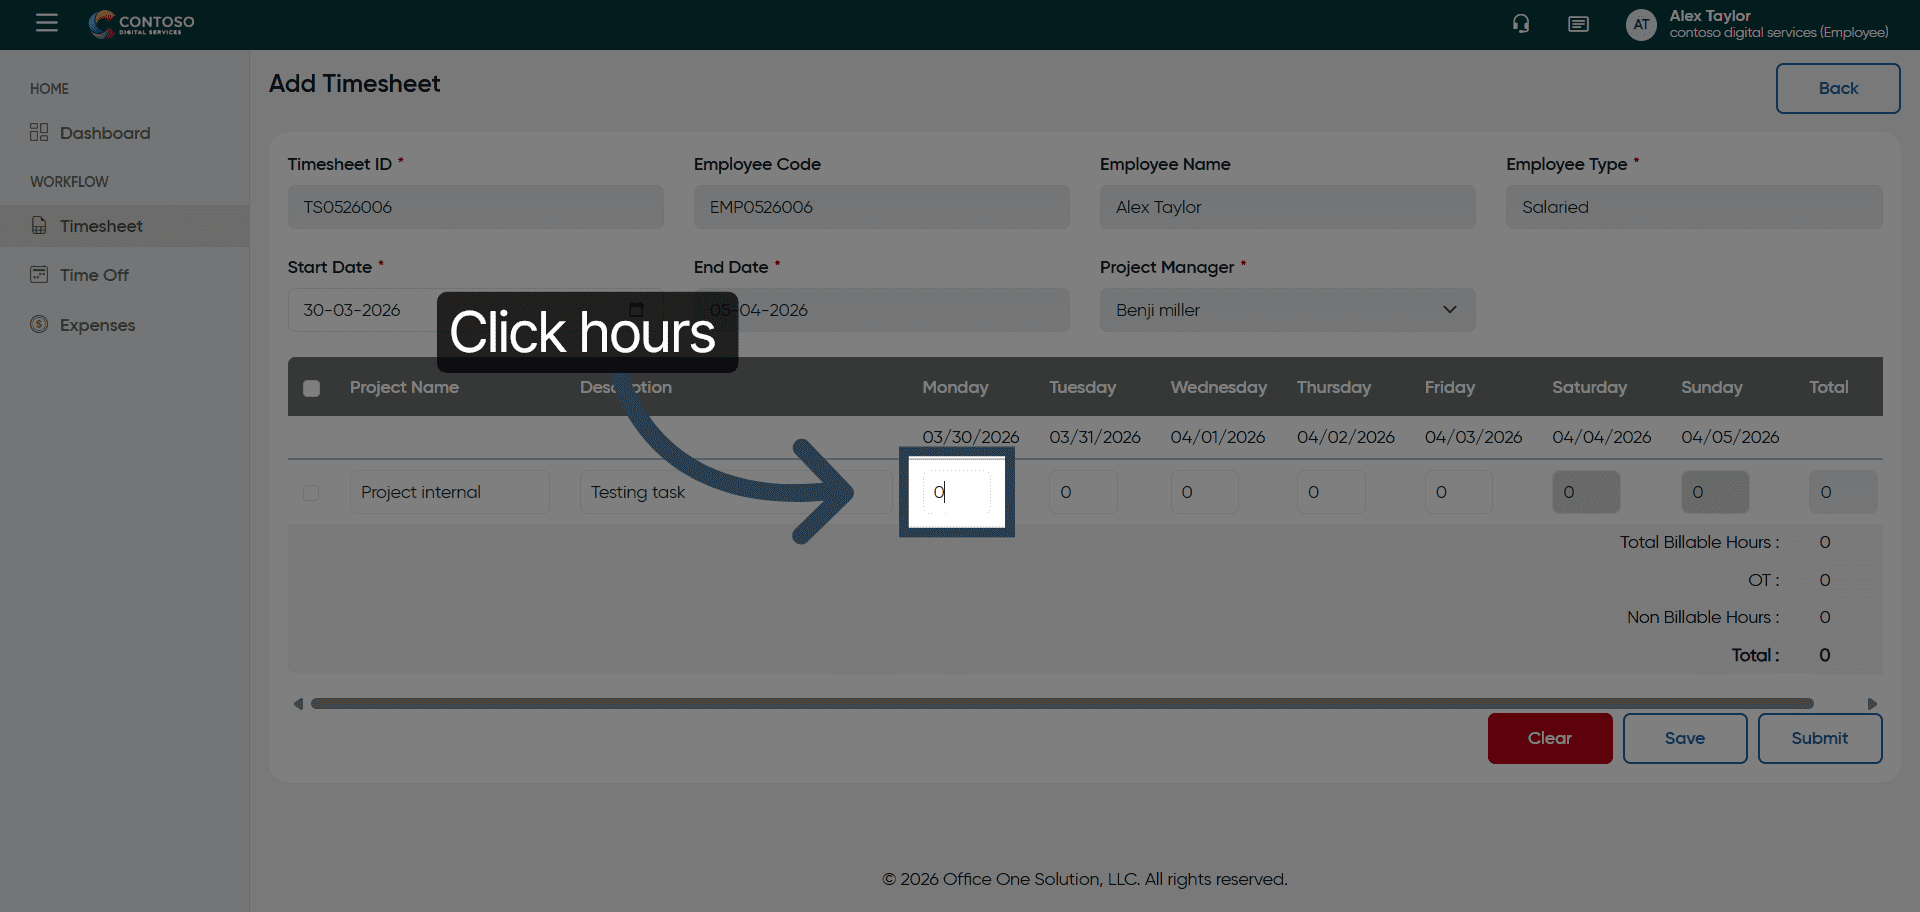
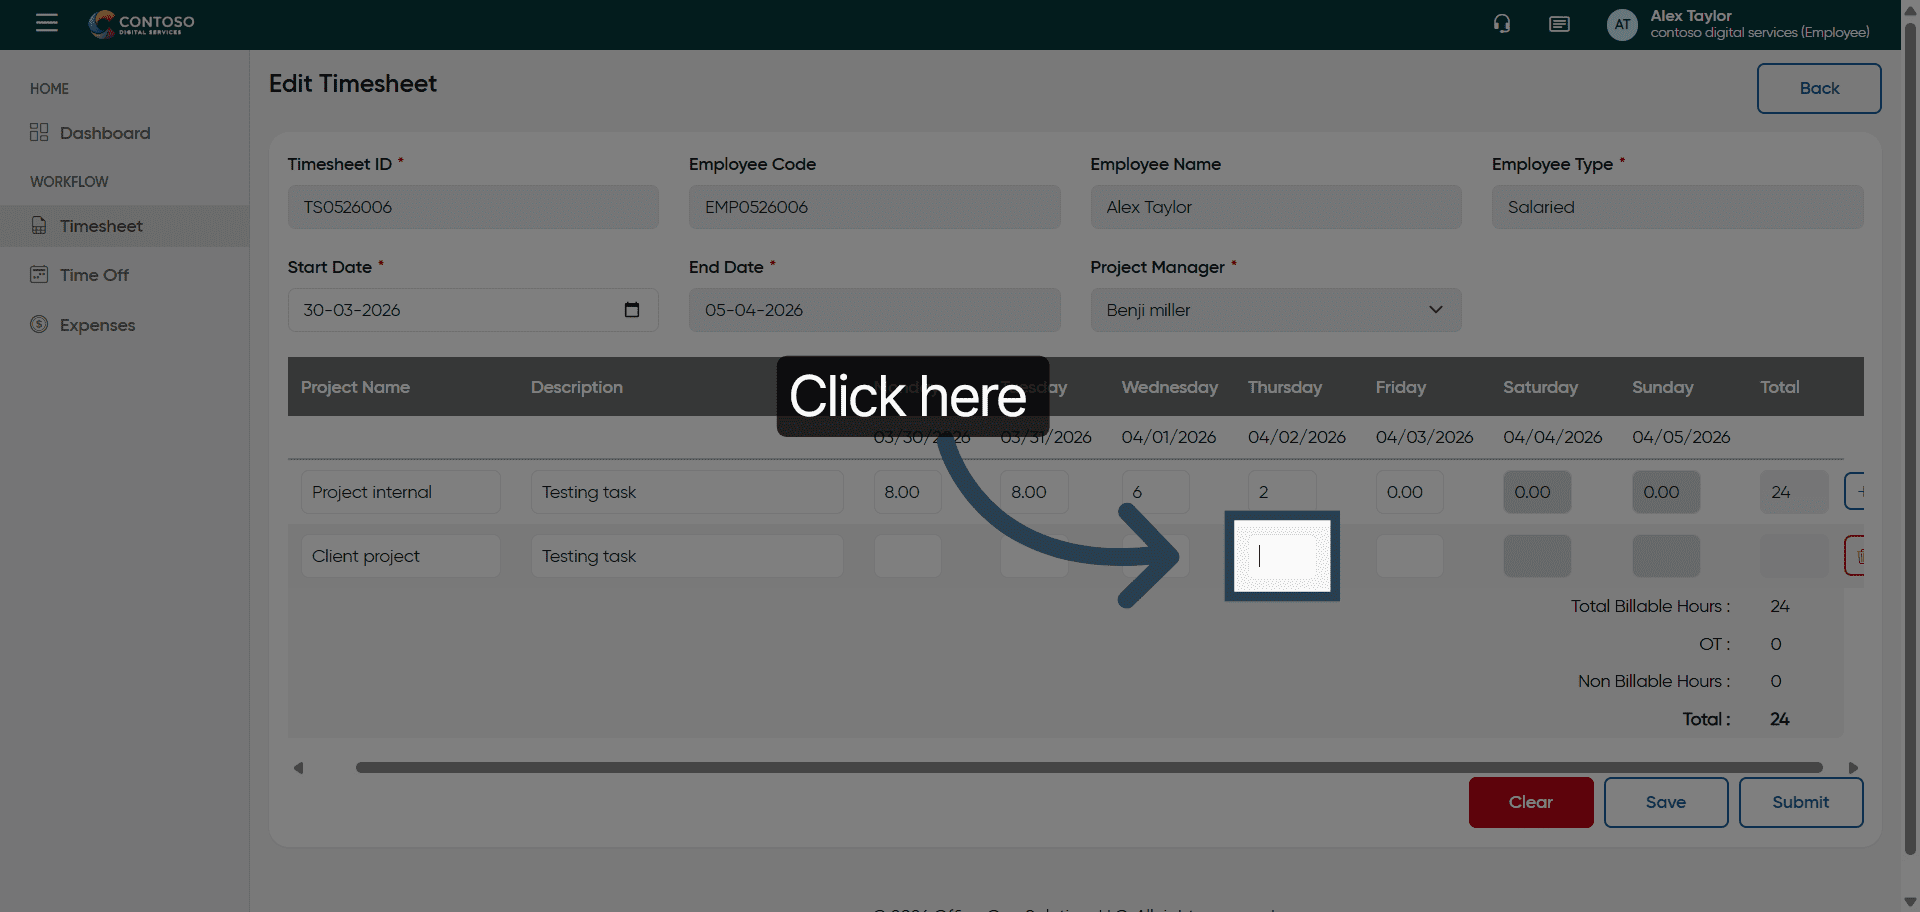
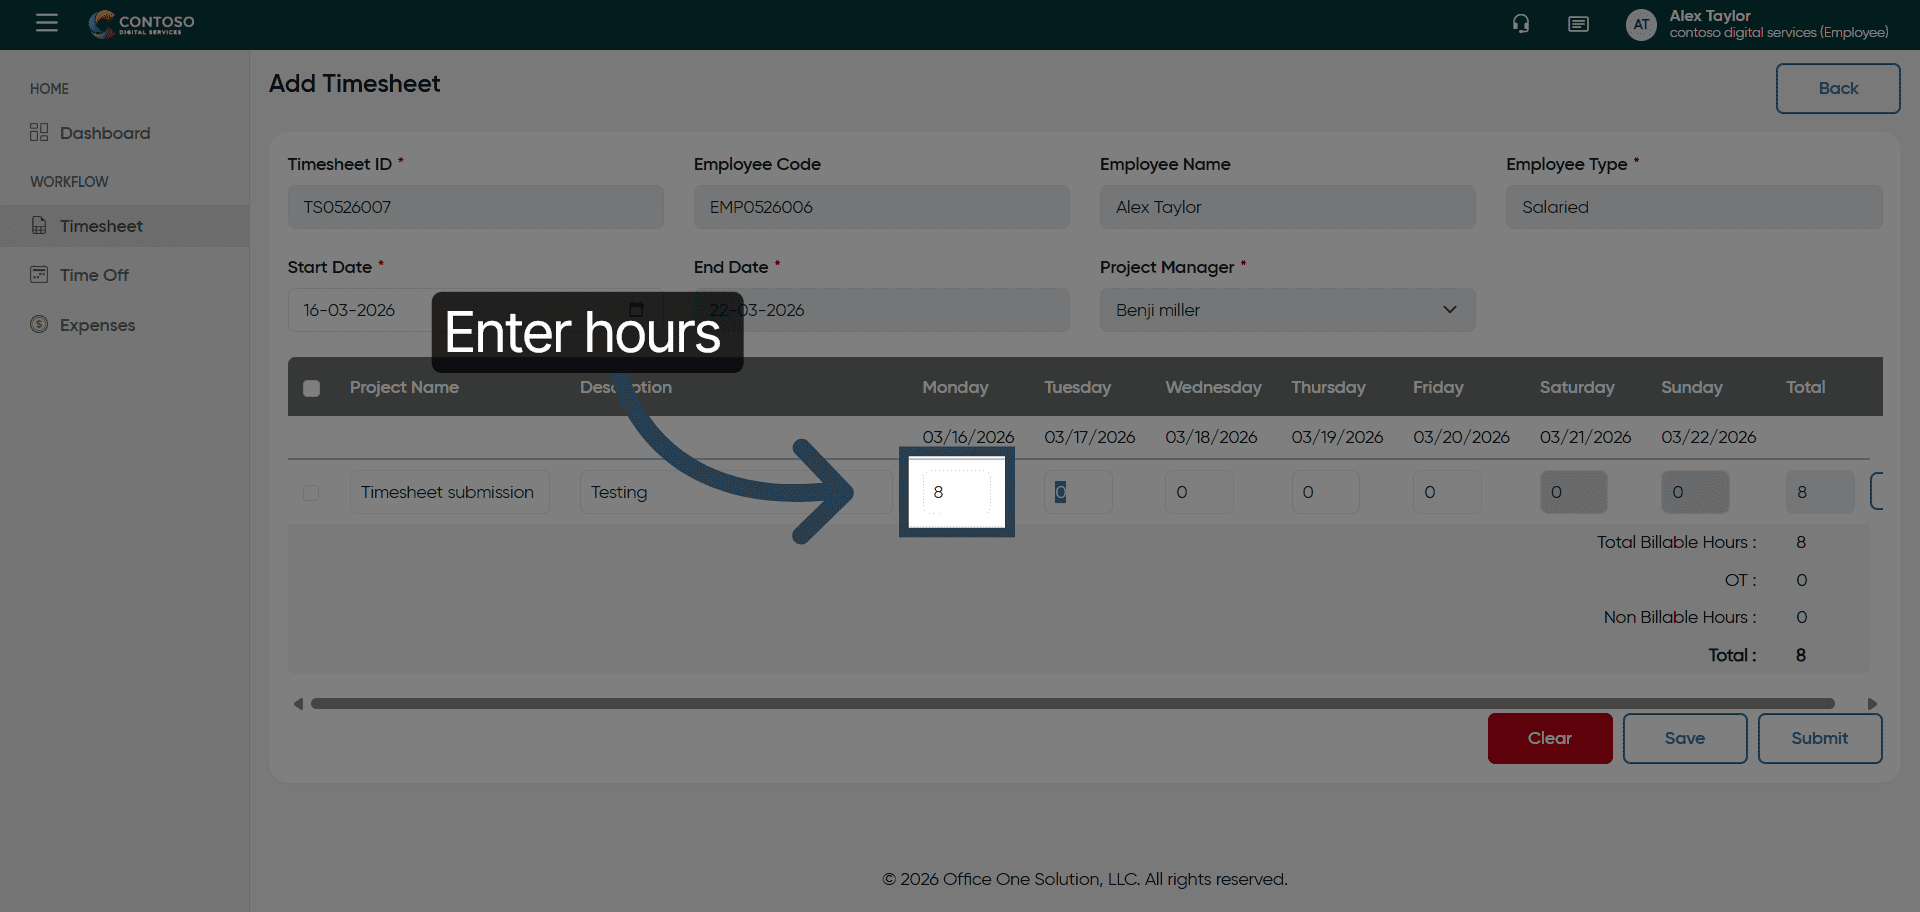
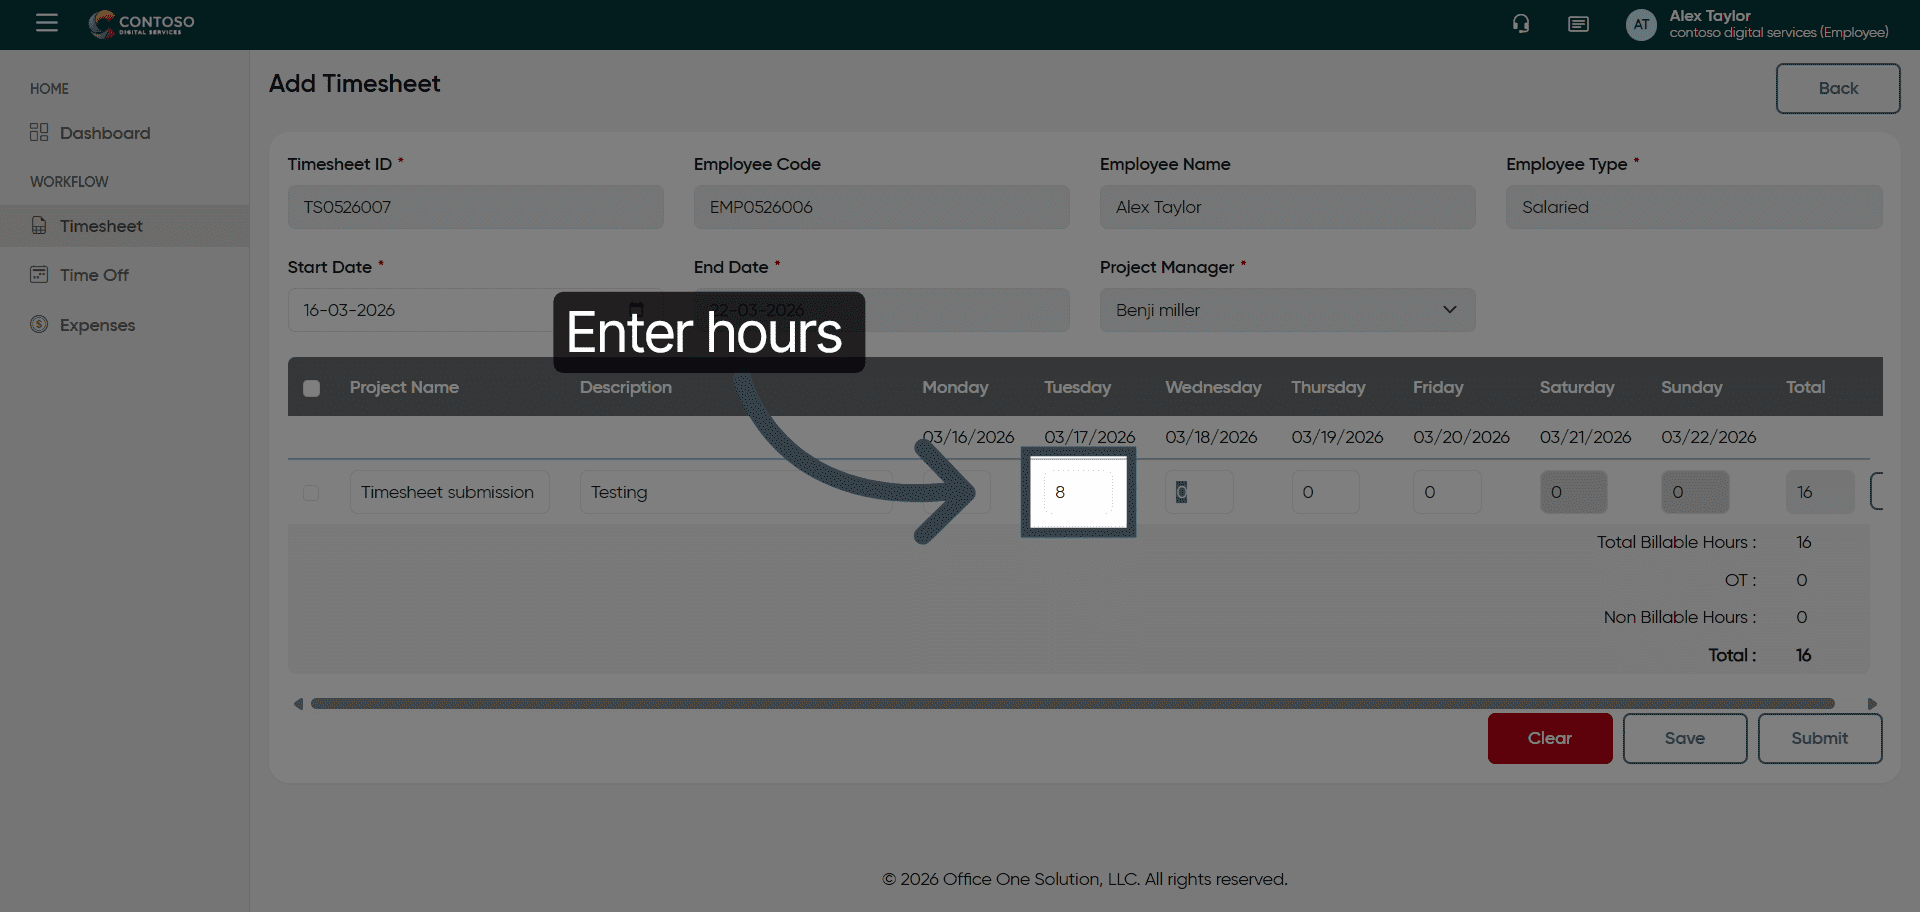
8. Select Hours Field
Fill the hours you worked on that selected date.
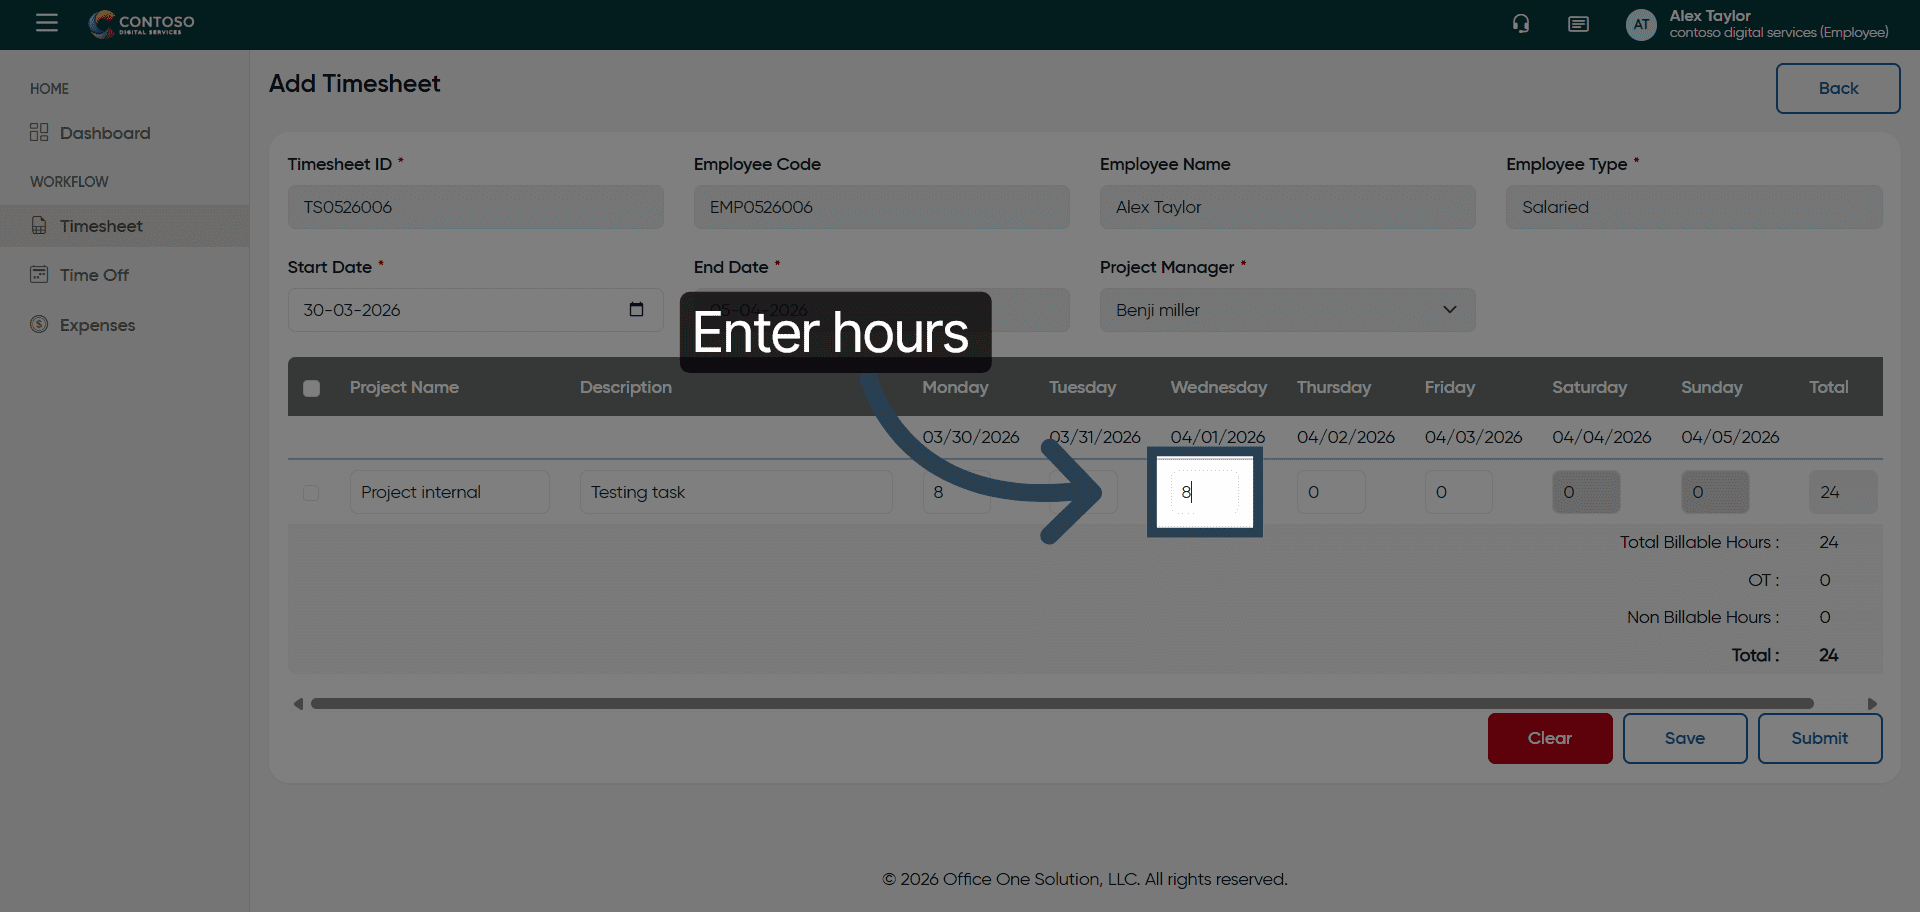
9. Enter First Hour Value
10. Enter Second Hour Value
Enter the hours you worked on the selected date.

11. Enter Third Hour Value
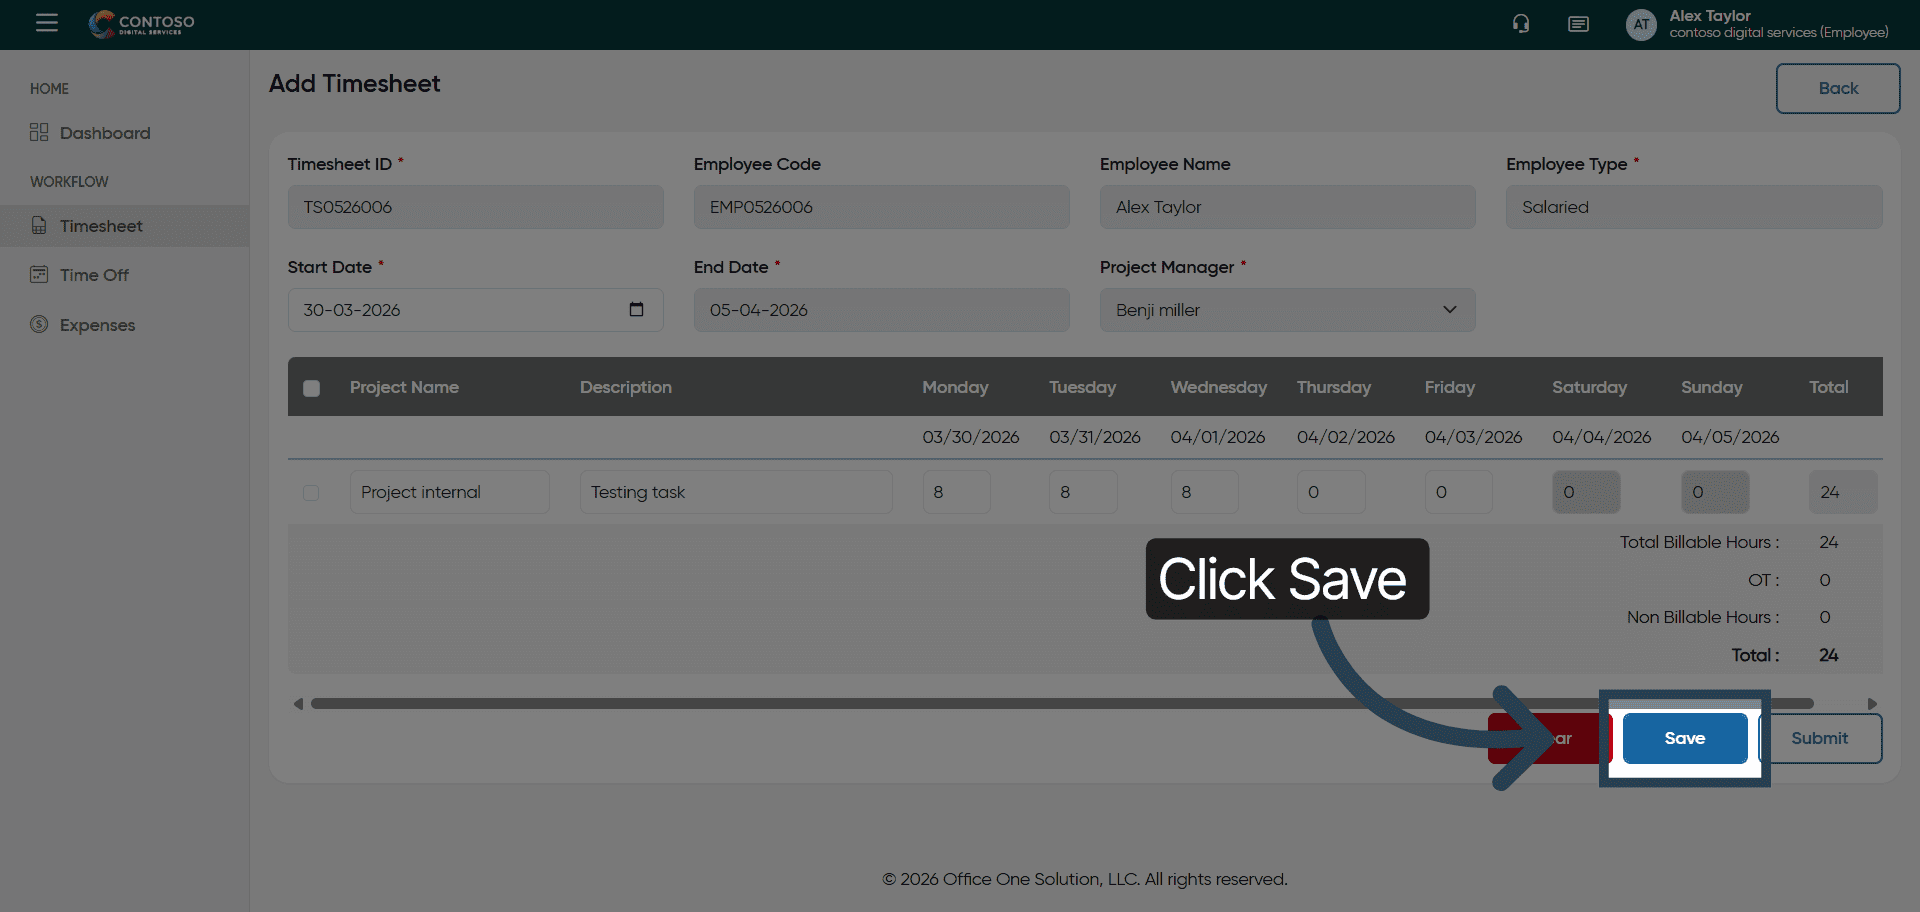
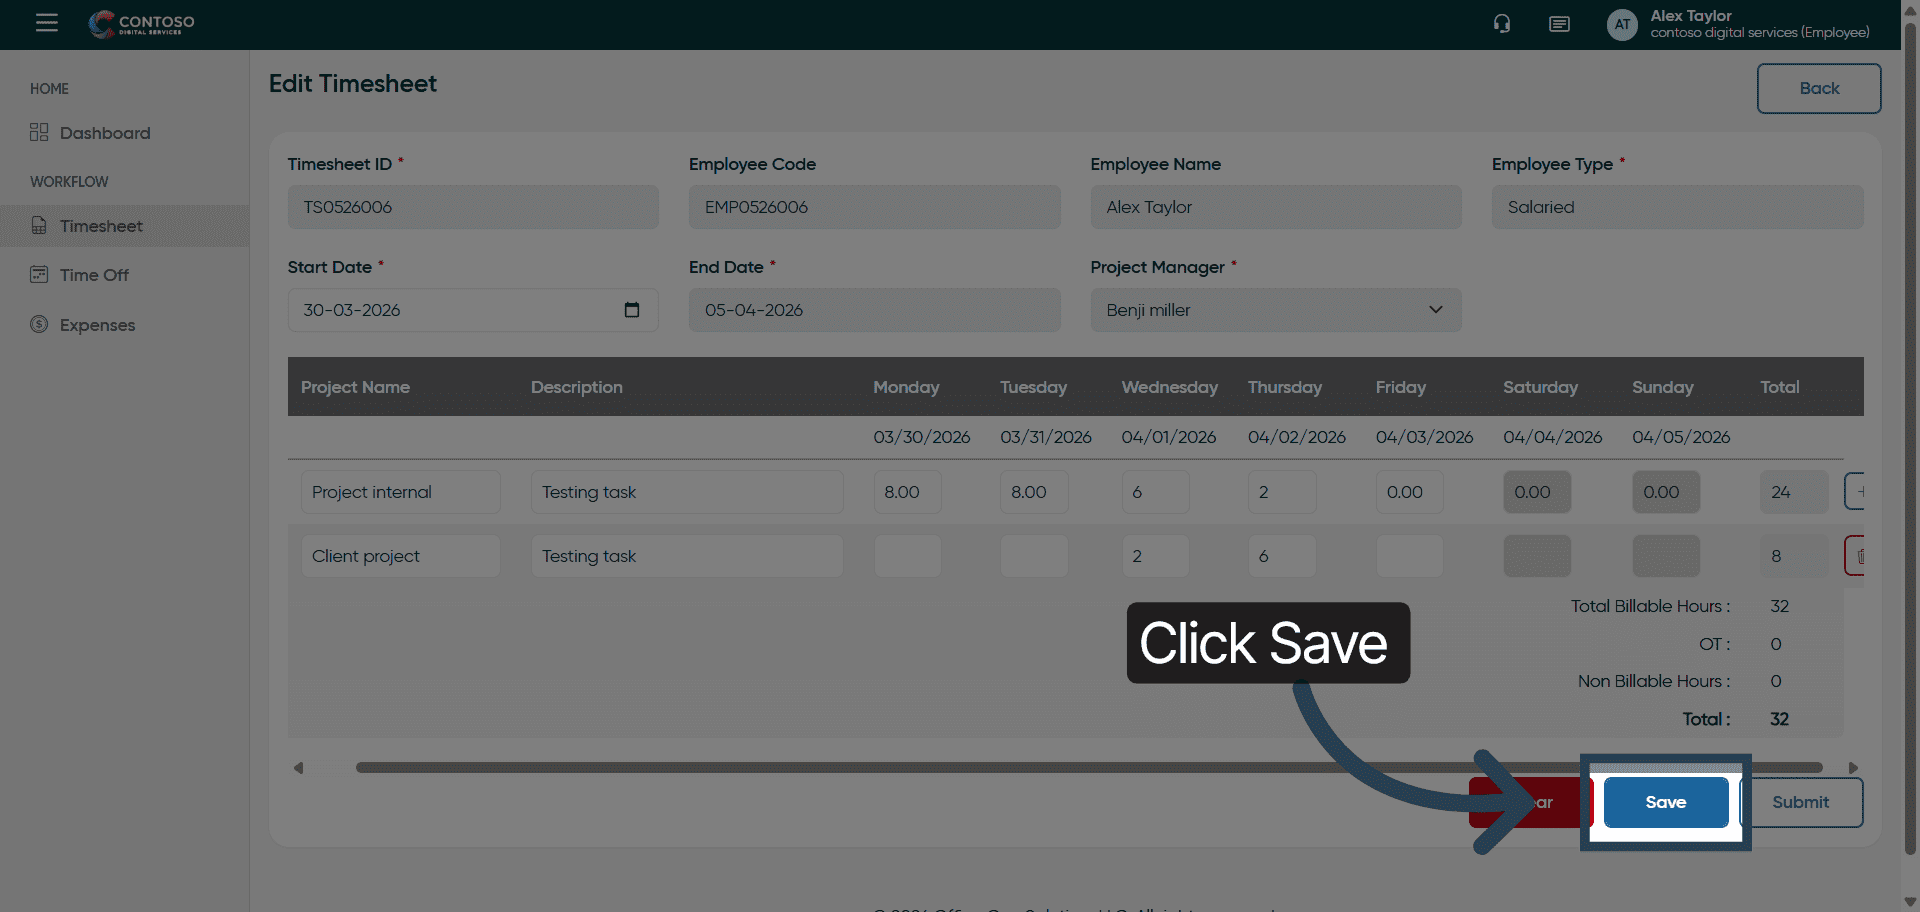
12. Save Timesheet Entry
Click Save to store your new timesheet entry.
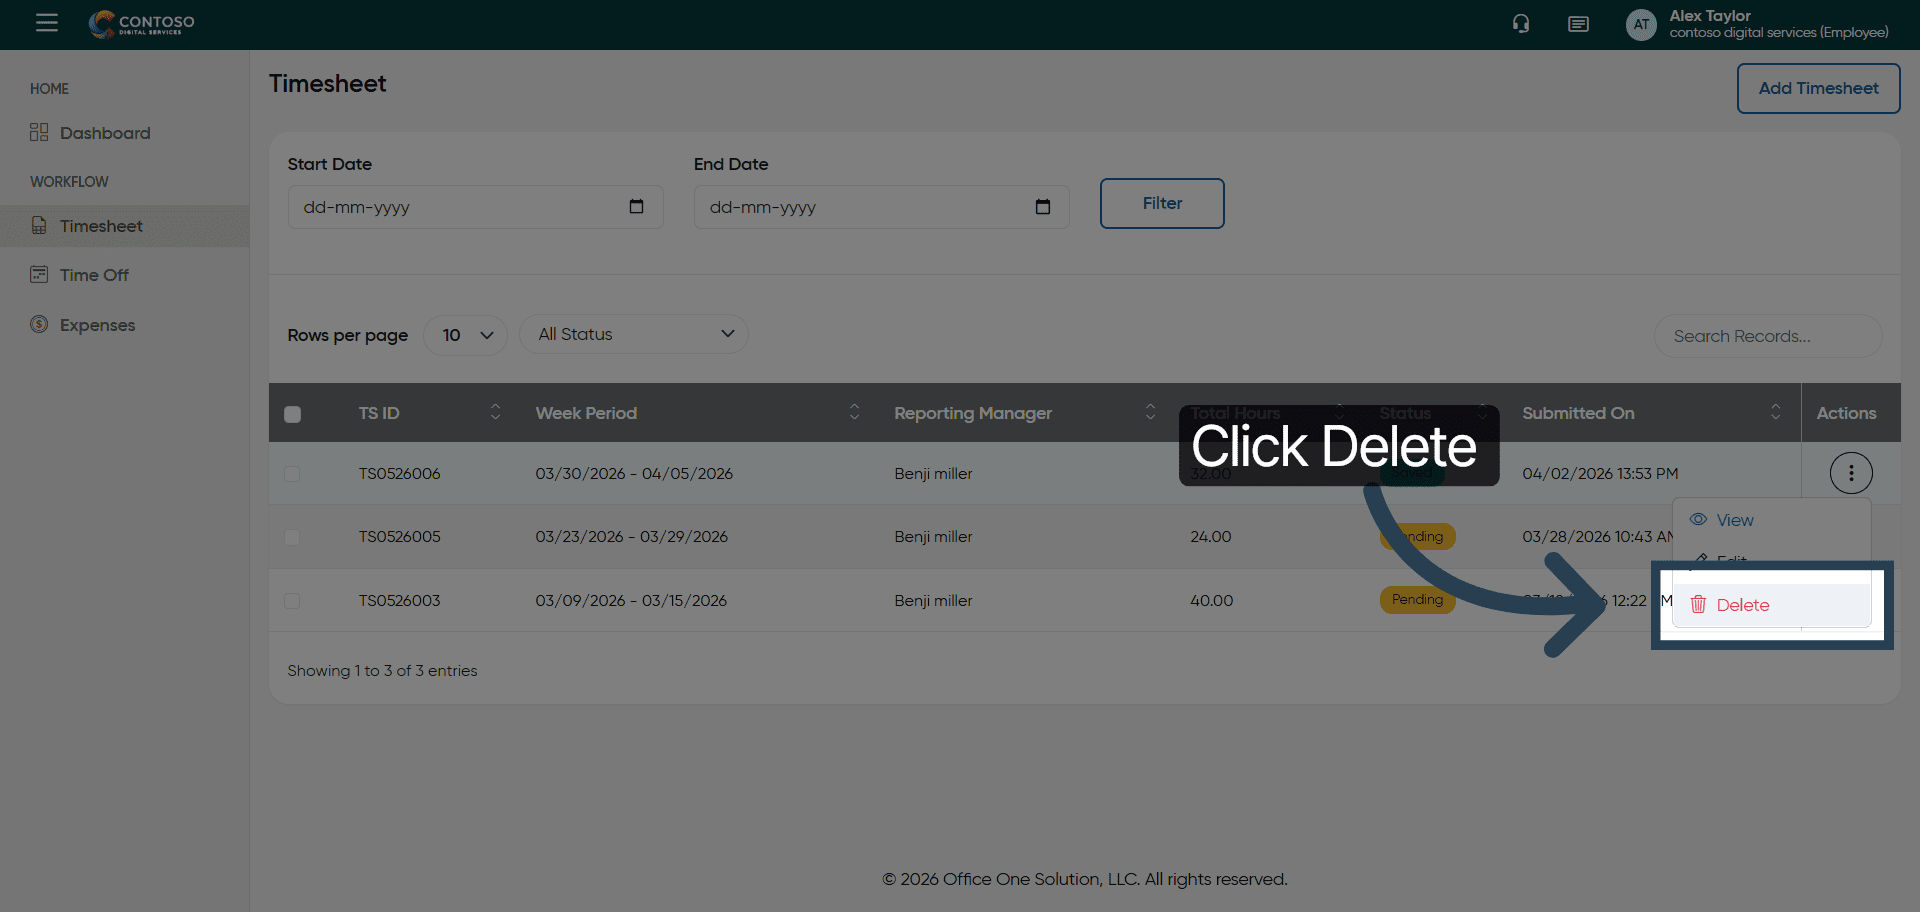
13. Access Timesheet Options
Click here to access additional options for your timesheet entry.

14. Open Edit Mode
Click Edit to modify your existing timesheet entry.

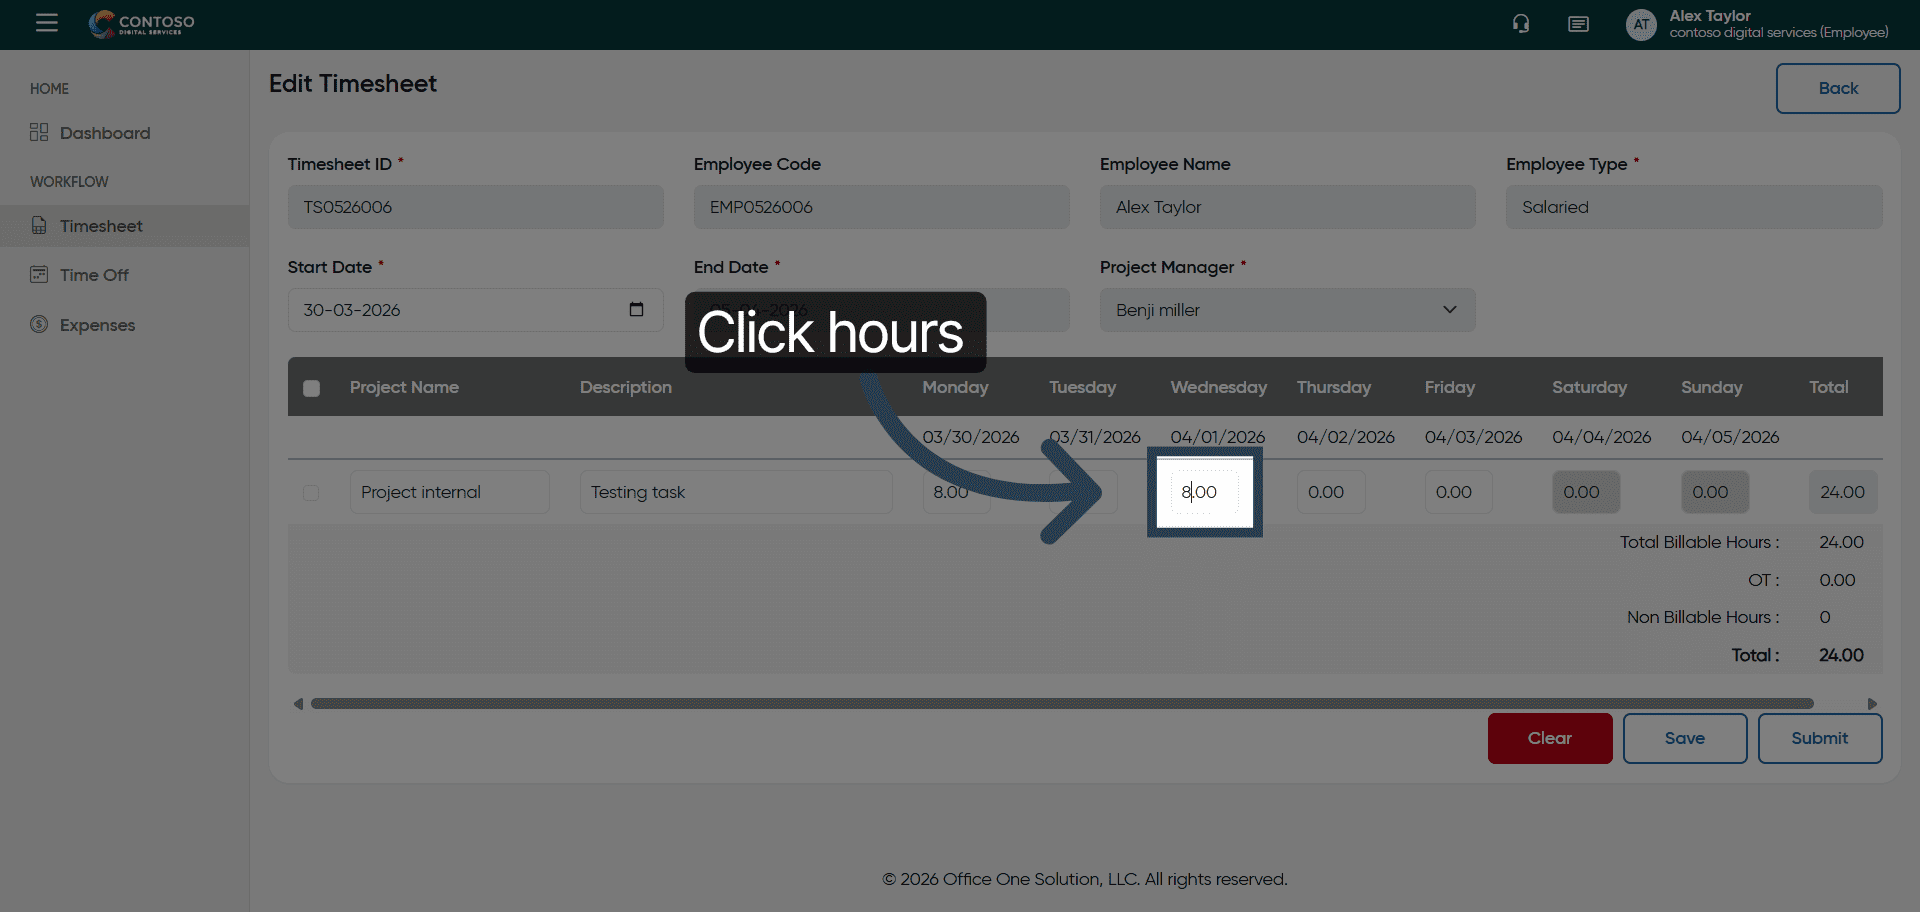
15. Select Hours To Edit
Update the hours from what you previously gave.
16. Update First Hour Value
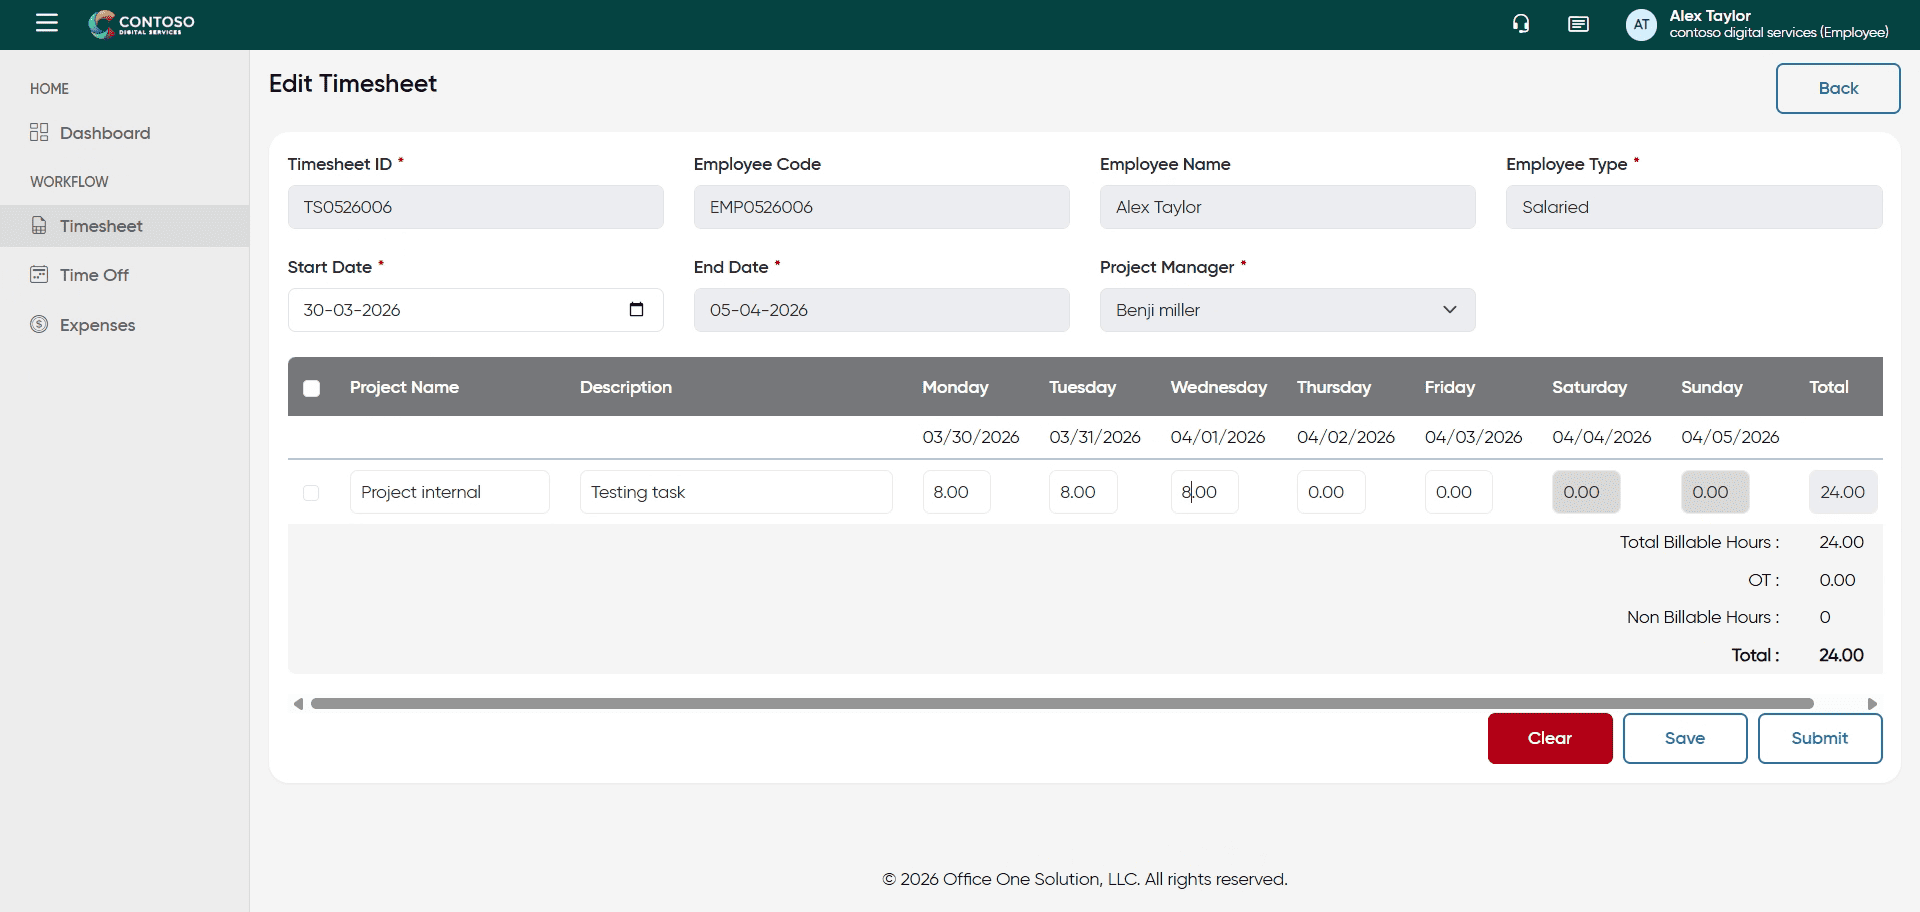
17. Update Second Hour Value
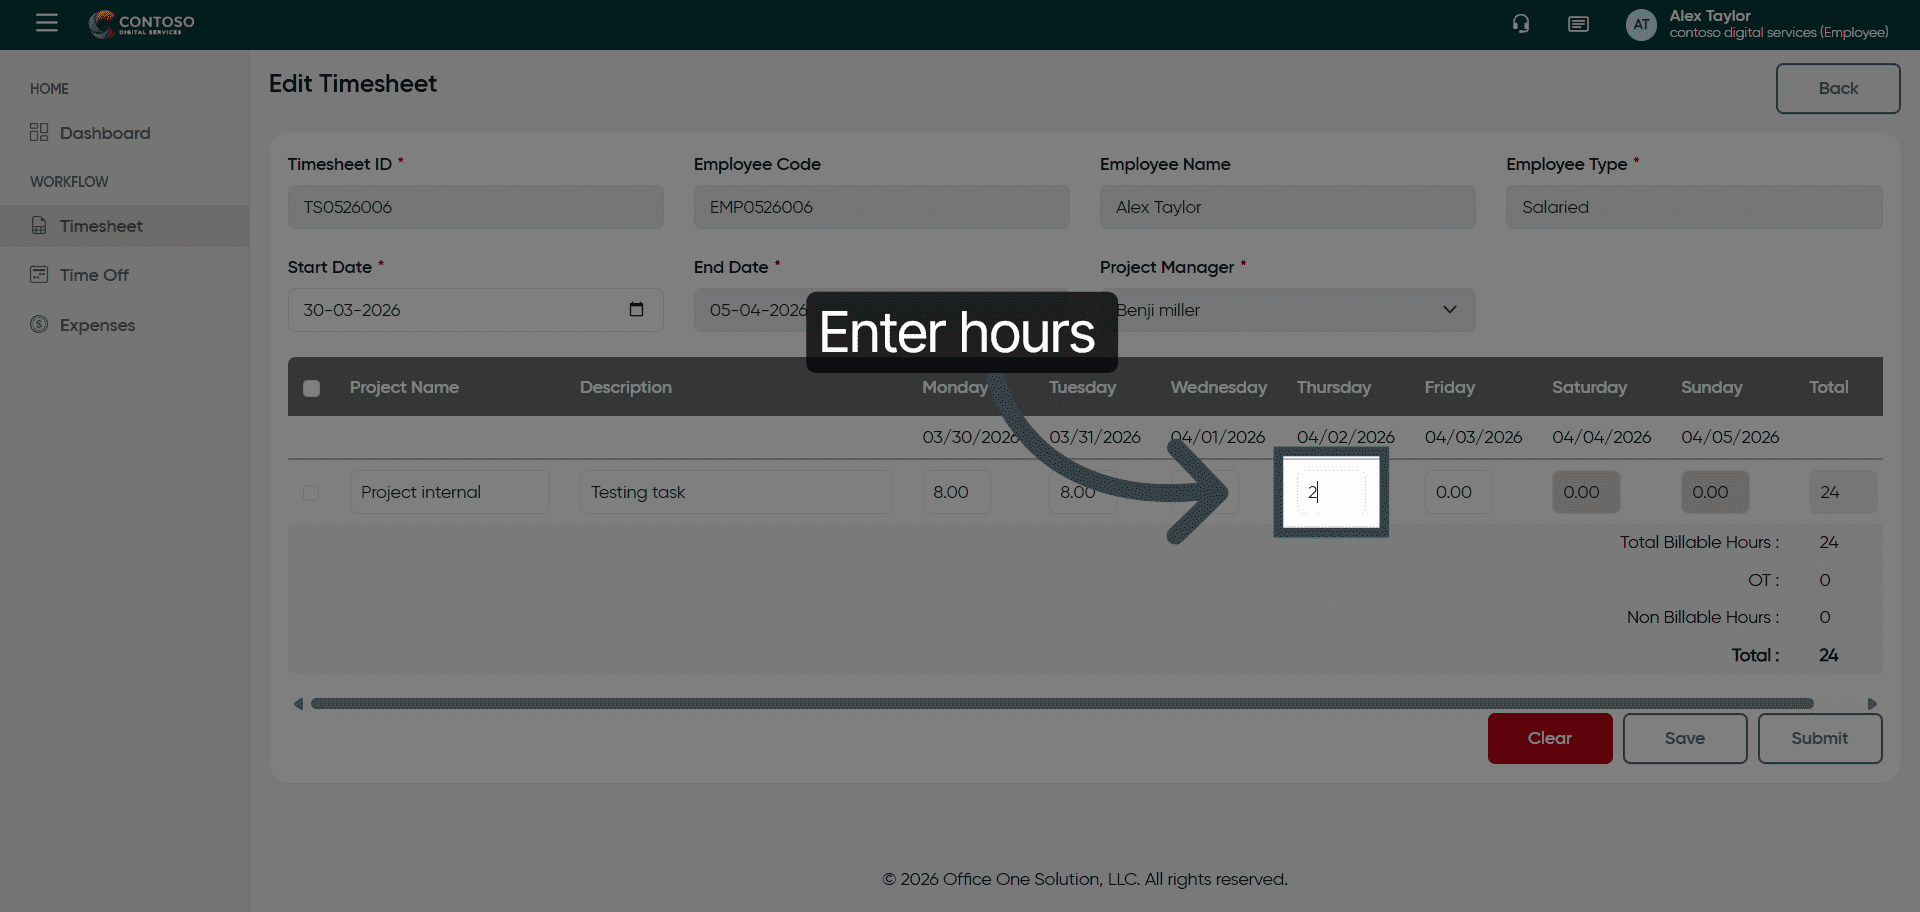
18. Access Additional Edit Options
Try adding another project.
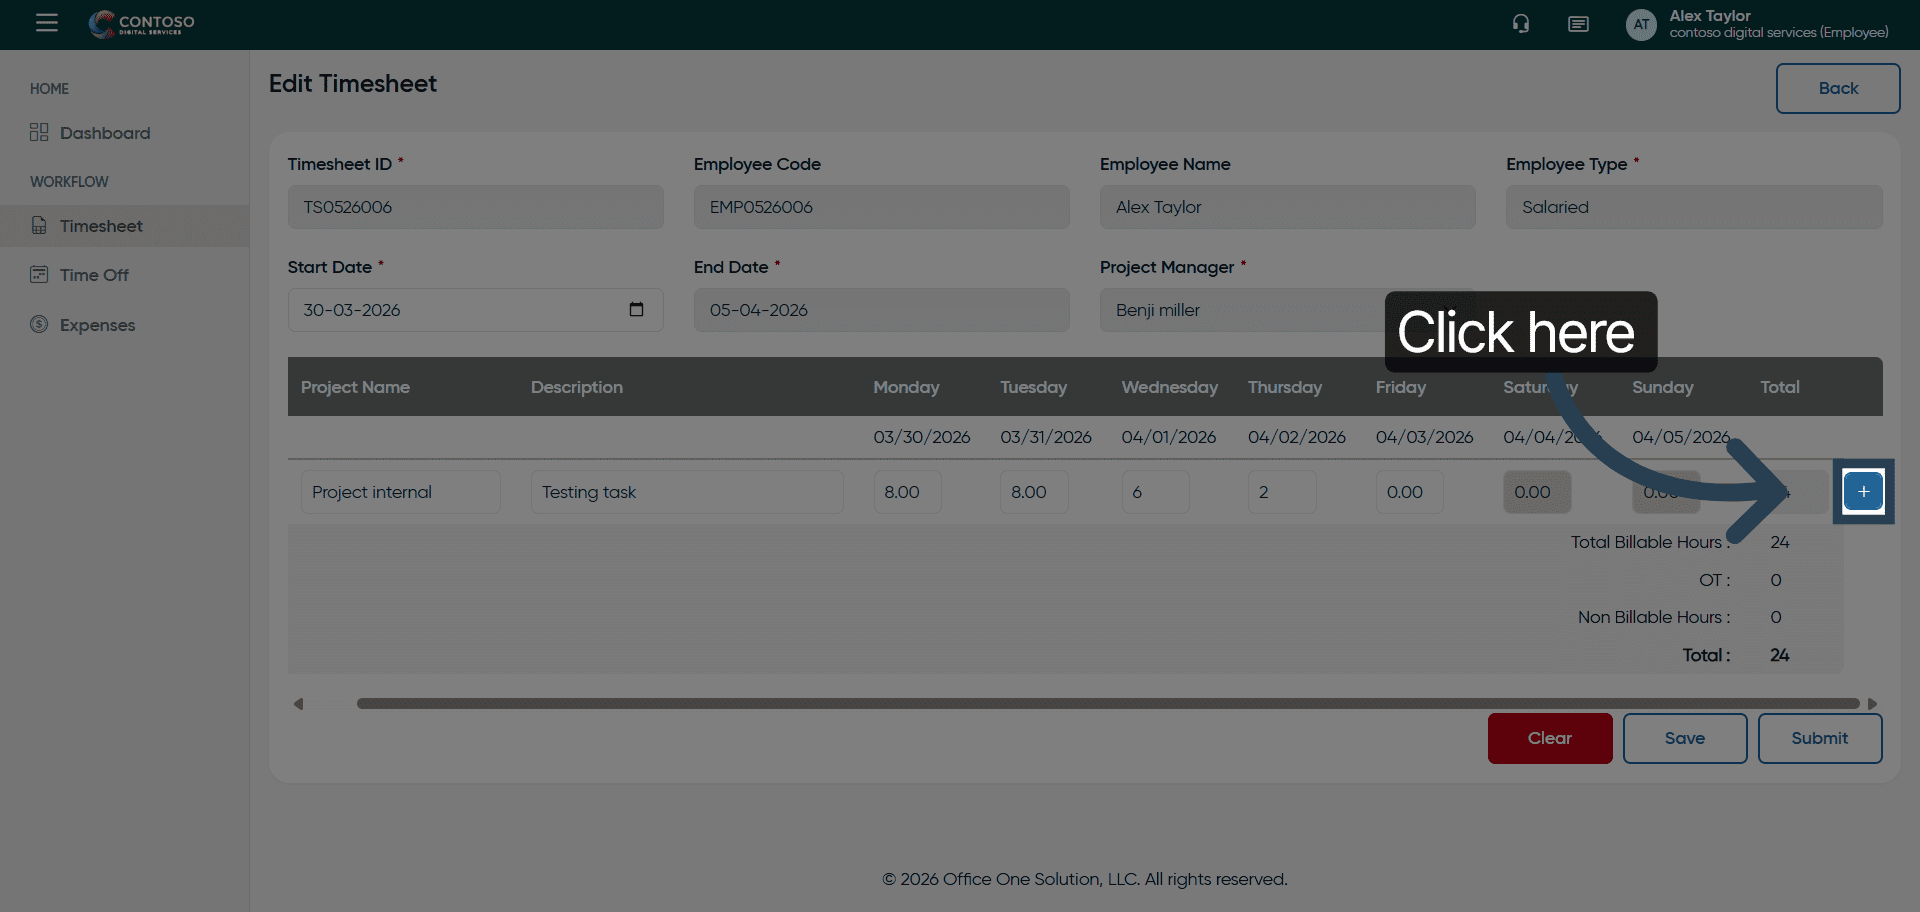
19. Select Project Name Field
Fill in all the details related to the second project.
20. Enter Client Project Name
21. Update Task Description
22. Access Hours Fields
23. Save Edited Timesheet
Click Save to apply your changes to the timesheet entry.
24. Open Timesheet Options
Click here to access options for managing your timesheet.

25. Delete Timesheet Entry
Click Delete to remove the selected timesheet entry.
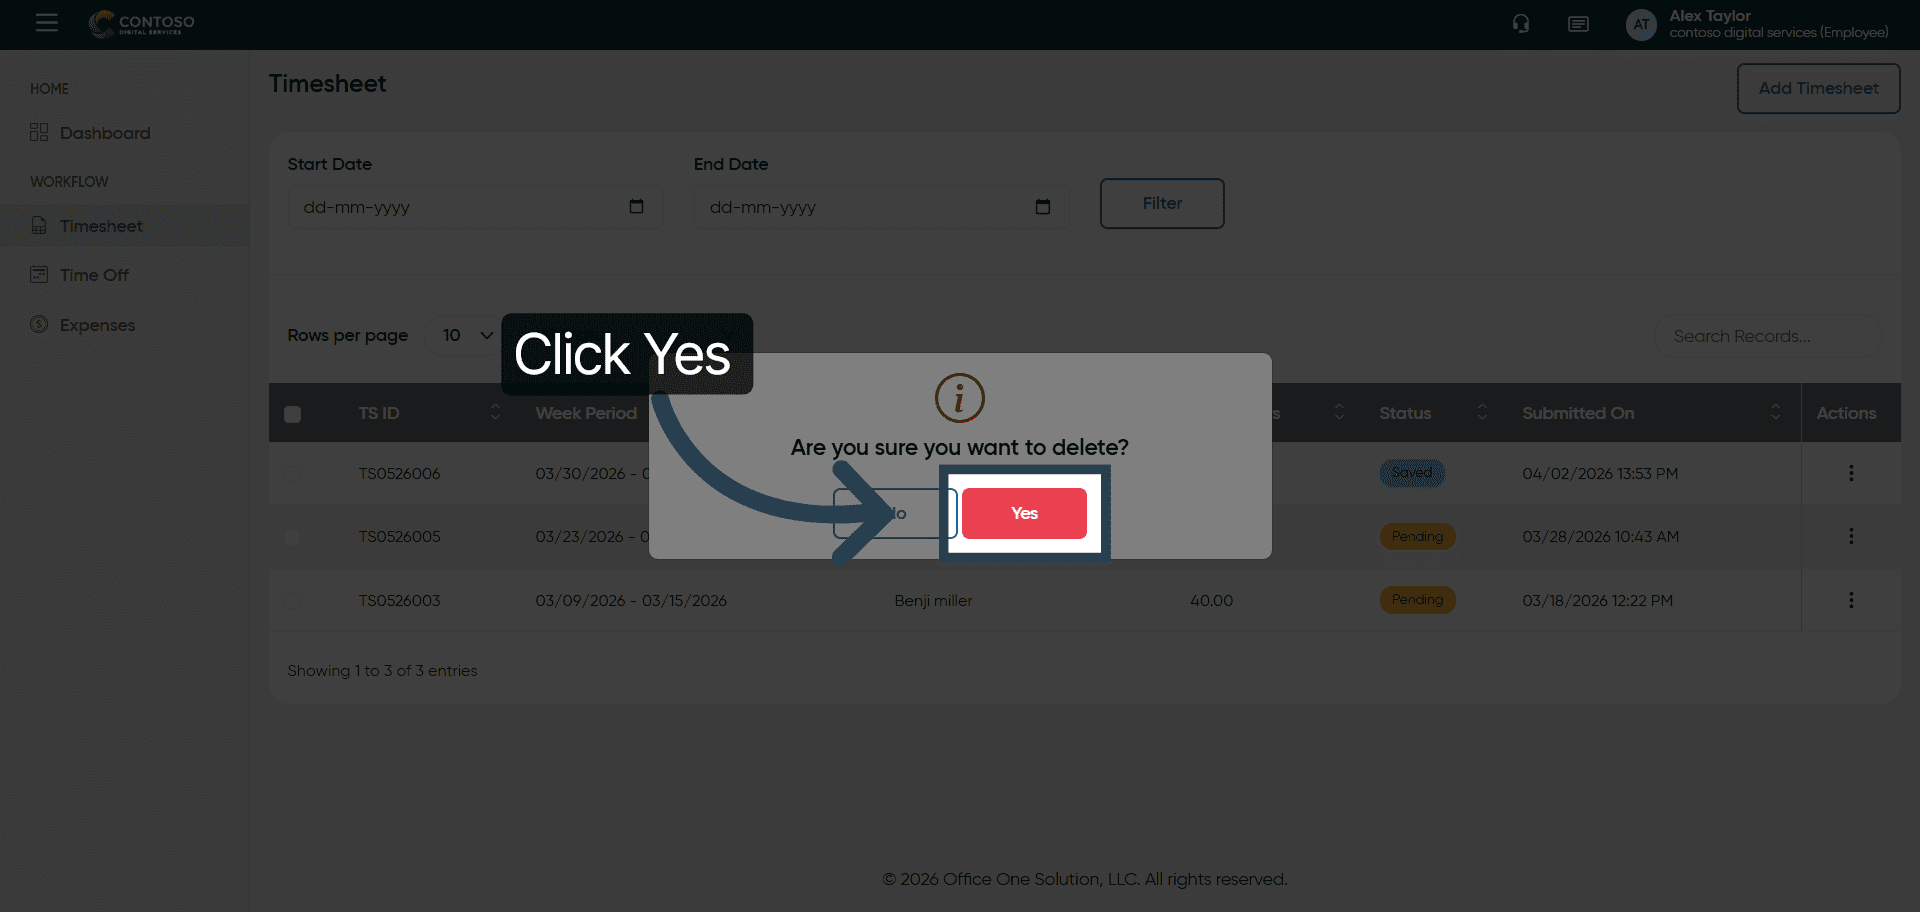
26. Confirm Deletion
Click Yes to confirm and permanently delete the timesheet entry.
27. Add New Timesheet Entry
Click Add Timesheet to start a new timesheet record.
28. Select Start Date Field
Click and fill the Start Date field to specify the beginning date of your timesheet.
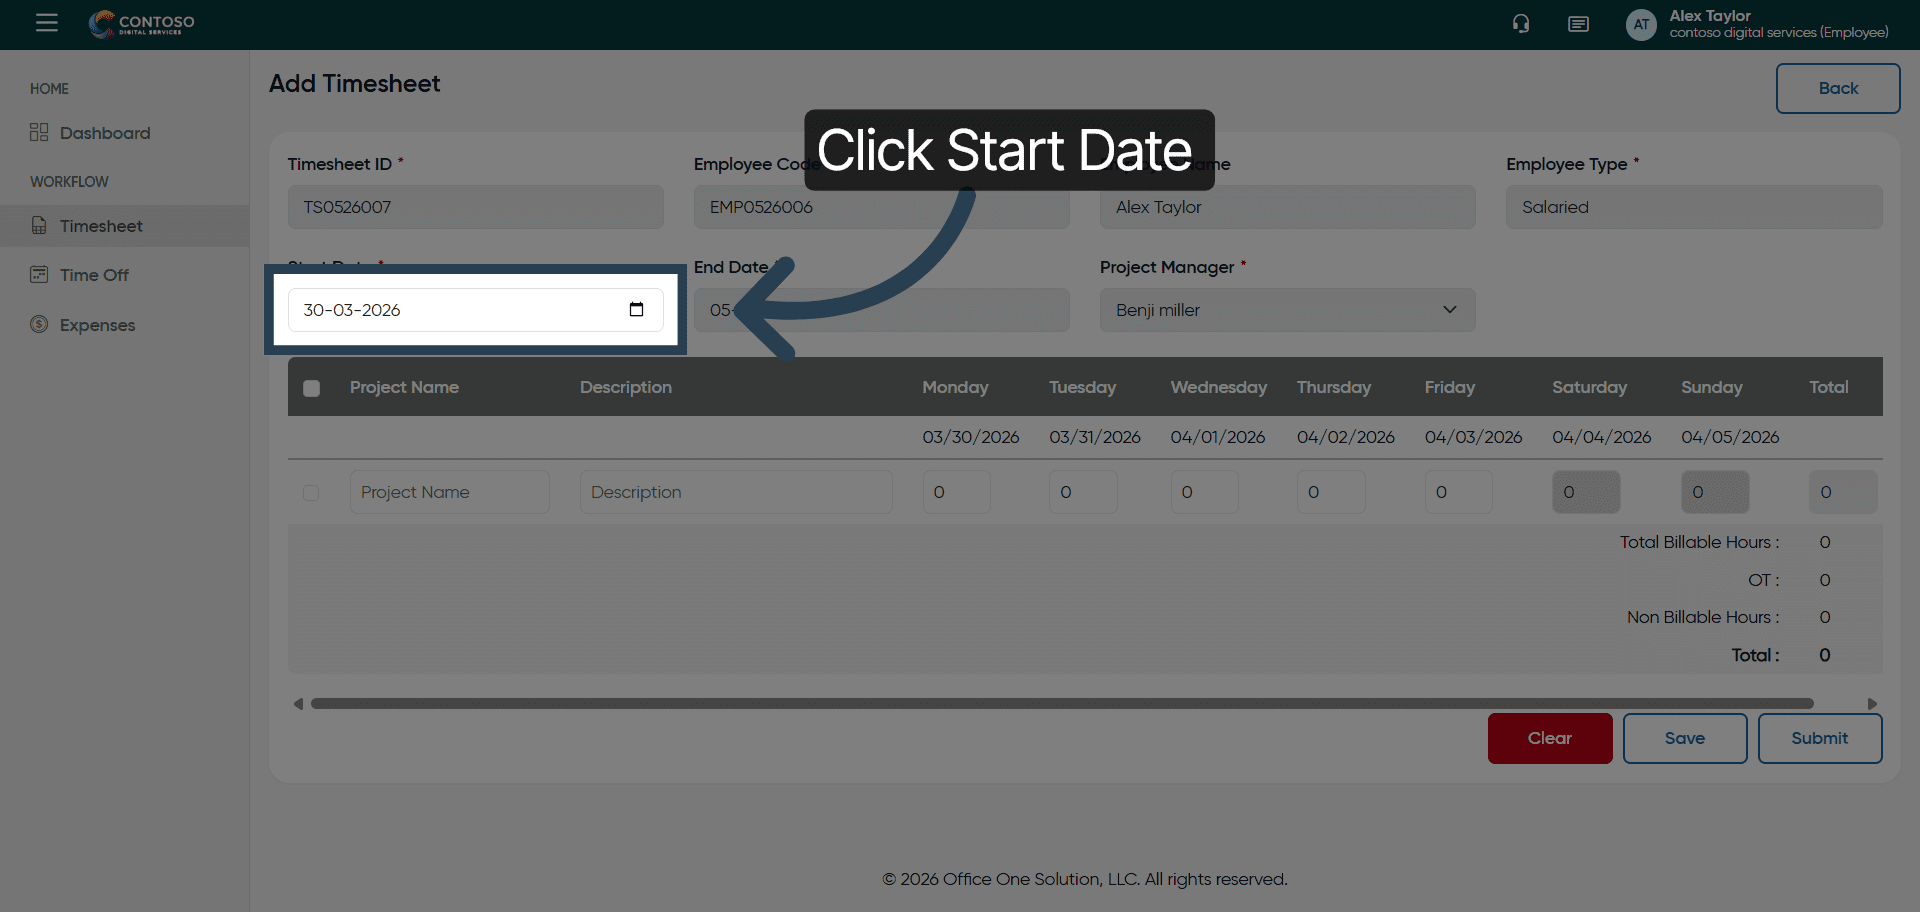
29. Enter Start Date

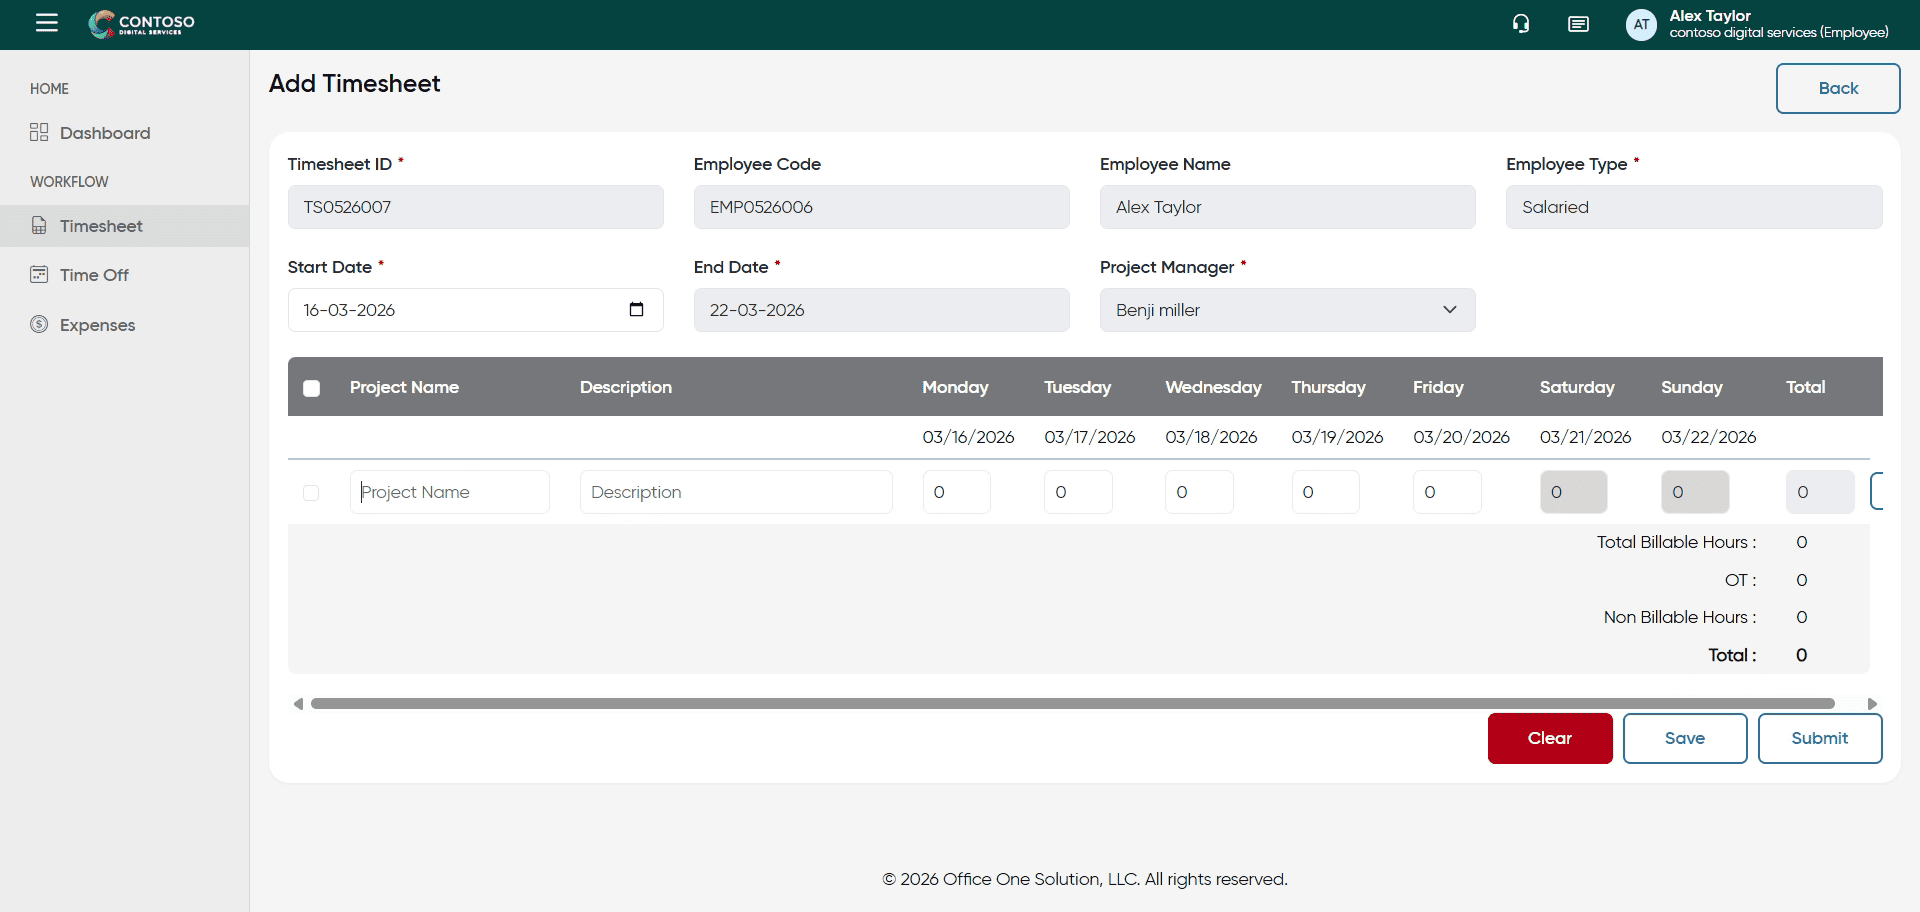
30. Select Project Name Field
Fill all the required details.
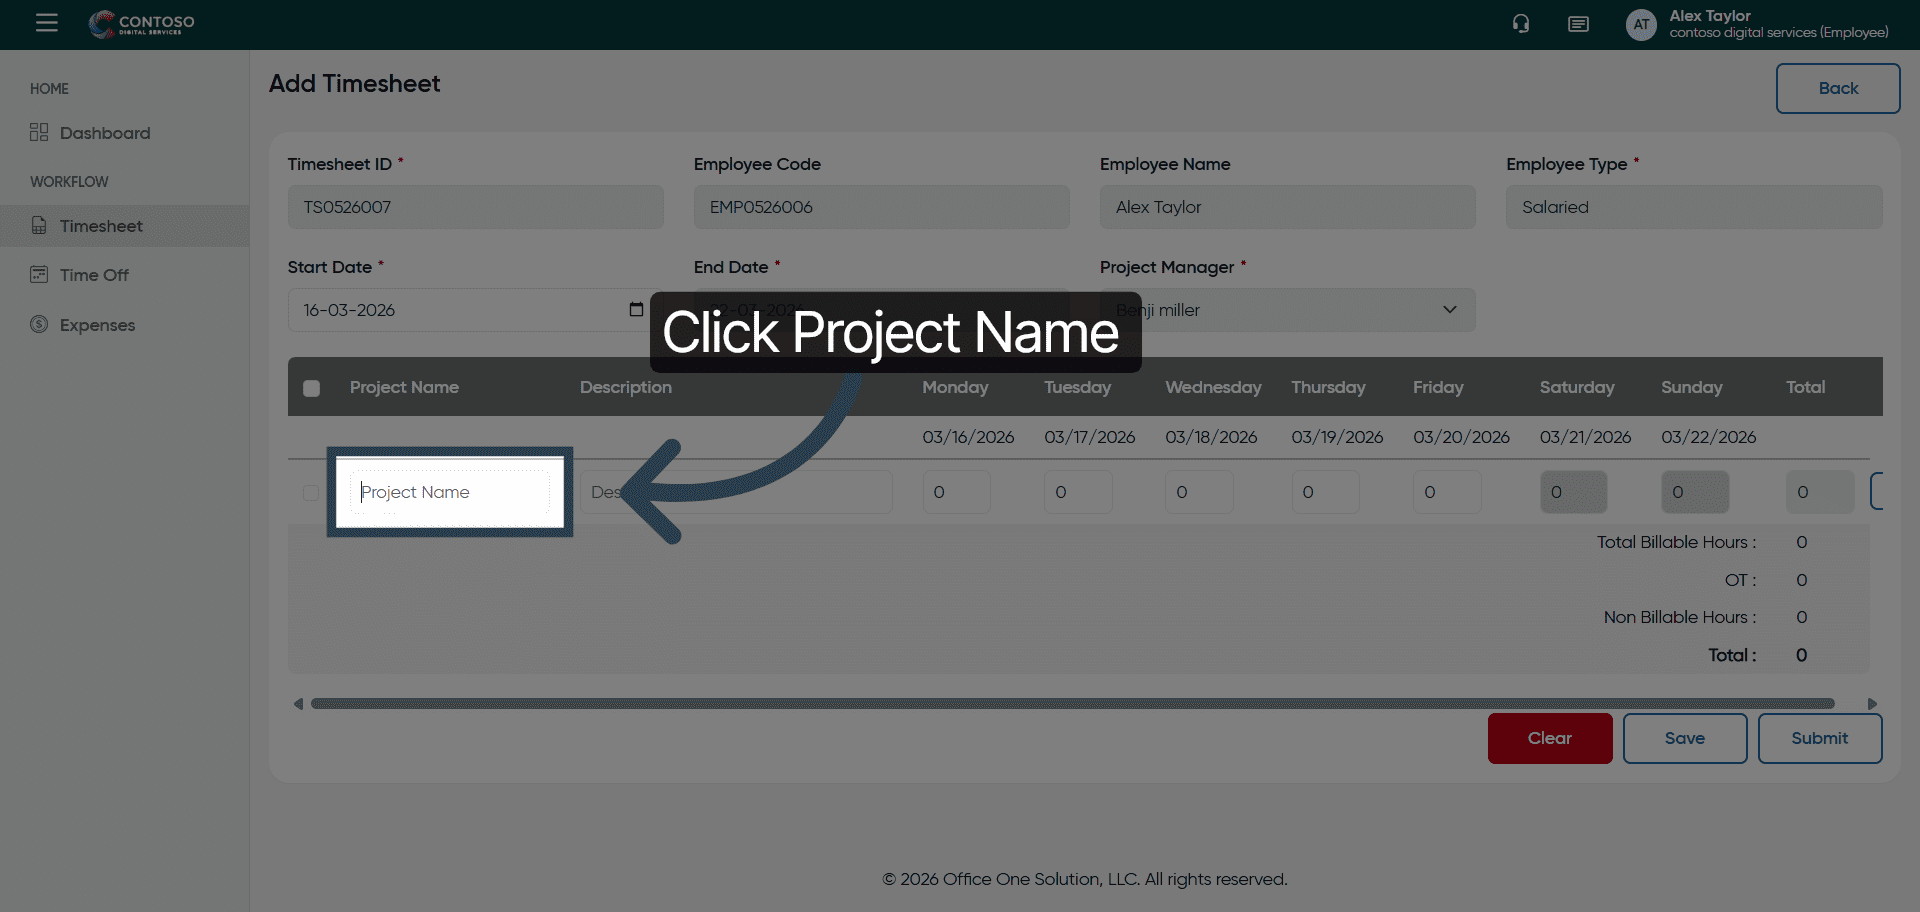
31. Enter Project Name
32. Enter First Hour Value
33. Enter Second Hour Value
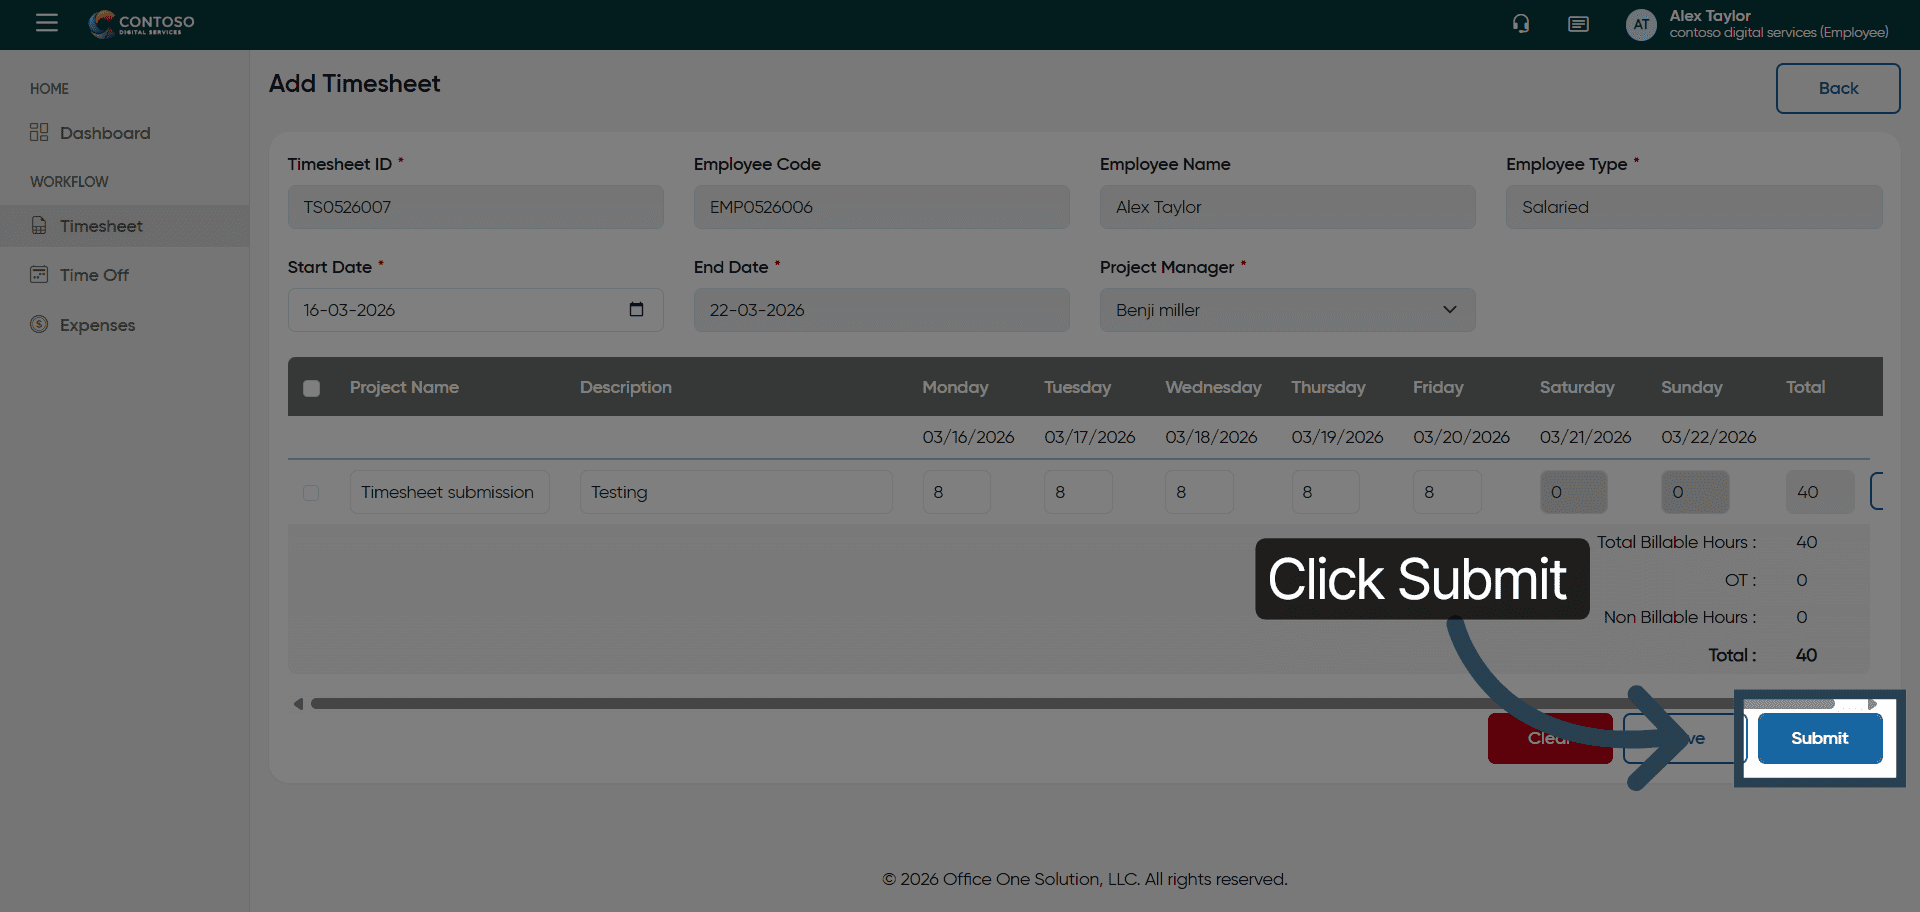
34. Submit Timesheet
Click Submit to finalize and send your timesheet for approval.
You have successfully managed your timesheets by adding, editing, deleting, and submitting entries in OfficeO Solution. Continue tracking your work hours regularly to maintain accurate records and streamline your reporting process.